Anixus Vex
firstly,
This 3D printer has been made possible by Hack Club and the awesome Alex Ren. Let’s give them a hand! 👏👏👏
Made by: @anicetus
Repository link: https://github.com/invictus-anic3tus/anixus-vex
Total hours so far: 21.5
- ✅ I have a 3D printer
about the anixus vex
I’m Anicetus, and I’m making a CoreXY because my Anycubic Kobra 2 Neo doesn’t print over 250mm/s and can’t print hotter than PETG. This will change all of that.
🕐 Speed I want: >350mm/s (probably can get faster)
📐 Build size I want: >300mm3 (maybe not, may have to go 250mm3)
👍 Materials I want to print with: TPU, PLA, PETG, HIPS (maybe,) PVA (probably not)
You may be wondering where I got the name “Anixus Vex.” It seems rather strange.
First of all, the first word is a play on my name, Anicetus (which means unconquerable in Latin). It’s basically just compressed to three syllables. Next, “Nixus” is Latin for “soaring” or “effort,” invoking a powerful vibe. “Nexus” is also the English (and Latin) word for the hub or the connection between things, which makes sense for an FDM printer that connects things! Also sounds really cool.
The second word, “vex,” is English (and Latin!!) for making somebody annoyed or frustrated, as you probably know.
It gives off a vibe of hot, fast anger, speedy and deliberate. Another Latin translation for it is to rouse or to excite, again invoking heat and agility. It is also a shortening of “vexare,” the Latin word meaning agitation or shaking.
Again, a short, fiery, awesome name.
OK, good. Down to business.
day 1 - feb 2 ‘25
Today I’m researching some parts!! Good stuff. I think ima use the Phaetus Rapido ACE hotend and BTT SKR E3 mainboard. Other than that, I have no idea.
The Rapido ACE HF is built for ~45mm3/s printing, which is really really fast and happy. I may upgrade to the UHF if I’m underbudget and want to go 75mm3/s.
I’m going with Nema 17 stepper motors, the most popular for CoreXY.
So far, we’re at 125 USD. 😬
Next, I looked for extruders. I went with the Orbiter v1.5, since it’s smaller and has a lot of support. For PSU, I went a generic 24v 600W.
I started CAD-ing, and got only the hotend and extruder in their places :P
Research and parts: 3 hrs
CAD: 30 minutes
day 2 - feb 3 ‘25
I started today off by doing some research! Some Slack members told me that the Orbiter v1.5 wasn’t going to cope with the high-flow Rapido Ace, so I decided to look for a new power pair.
I asked ChatGPT about some stuff, and it pointed me eventually to the Orbiter v2.0 and the Phaetus Dragonfly BMS, getting closer to 450mm/s which is pretty nice! The Dragonfly can also get to around 300°C, which is perfect for PETG and some hotter filaments.
Next, I remembered something kind of big: Klipper host. In my opinion, Klipper is way better than Marlin at a lot of things, and it was a must in my design. I overlooked the hosting, however. I thought, “Well I can use the Raspberry Pi 3B from my other printer, right?” While that could be a viable option, ChatGPT (coming in clutch yet again) showed me instead the BigTreeTech Manta M4P + CB1, which is a mainboard that has a Klipper host integrated with the mainboard! If I’m under budget by the end of this thing (unlikely,) I’ll upgrade the the M8P, which has more capabilities for extra motors and stuff. I looked for some linear rods and got a good idea of pricing, although I haven’t CAD-ed anything since deciding to use the Orbiter v2.0 and Dragonfly. I added a BLTouch to my cart, bringing the total so far to… $240 😭
Yes, that’s nearly the budget right there, without any extrusions or cables or anything. I think I can fit the extrusions and such in the $60, but it may be tight. We’ll have to see!
(Later) OK I did some MORE research and decided to go back to the BigTreeTech SKR E3 Mainboard and host both off my one Rpi. If it goes bad, I’ll buy a Rpi Zero W.
I figured out some stuff with part cooling and whatnot, readjusted the CAD, got the printhead semi-set up, and more! Well that’s it for today.
Research and parts: 4.5 hrs
CAD: 1.5 hrs
day 3 - feb 4 ‘25
Today was mainly a research day (again.) This is me the following morning because I forgot to update 😁
Anyways, I did a lot of research on the best motors for my setup and found a really good deal for 3 for about $25, and they’re strong enough to let me go around 430mm/s straight. If you want the link DM me or check the BOM spreadsheet above
Then I started CAD-ing, and I’ve got nearly the entire printhead set up! I think I’m going to use a CFD to simulate the fan airflow just to make sure it works, but other than that I need to add the BLTouch, some PETG framing, and I’ll be essentially done there. Also, cable management 😬

Research + parts: 4 hrs CAD: 2 hrs
day 4 - feb 5 ‘25
Today I worked on the BOM a bit and researched where I might find cheaper parts. I think I over-calculated how expensive the frame will be (hopefully) so maybe I’ll get out of debt? Worst case I spend 30 bucks out of my pocket.
I have plenty of doubloons from High Seas, but DigiKey and the rest don’t seem to have great parts. Surprisingly, DigiKey has absolutely no 3D printer mainboards, and the stepper motors they have aint worth squat. The rest of the time was basically just CAD, with a side-tangent to try an airflow simulator. I decided not to, though, because I was lazy. I worked on the fans, connected it to the linear rail, and made my logos!
Research and parts: 2 hrs CAD: 3 hrs
![]()
day 5 - feb 6 ‘25
Today I didn’t do a whole lot because of schoolwork and other projects. I CAD-ed a little and that’s basically it.
CAD: 1.5 hrs
day 6 - feb 7 ‘25
Today I had a stroke of genius ok maybe just a stroke and I decided to make the Vex a dedicated upside-down CoreXY! It’s mainly for print farms and stuff because when the bed cools, the printhead just gives it a little nudge and the print falls right off! Also it just looks cool.
I’ll probably make it reversable so you can print like a normal person if you want, with feet that can be put on either side and a removable Klipper host/screen. This does mean using linear rods instead of rails, though, so it may get more expensive? Idk.
Anyways, I’m still deciding on whether to have the motors upside down as well as the printhead, because if they’re right side up (from your view), they’re sitting on the desk/ground, but the carriage is reversed. This means that the model is effectively flipped X and Y (rotated 180 degrees) which may be an issue? I don’t know. Probably not, right? RIGHT??
Either way linear rods are a good thing to do so that’s what I’m doing.
(LATER) I did a lot of research and apparently upside down corexys are a really bad idea. Welp. It’s OK, I’ll do normal CoreXY and use linear rails still because they’re also apparently good for speed and such. I did a tiny bit of CAD
Research: 2 hrs CAD: 30 min
day 7 - feb 9 ‘25
Yesterday I had an all-day D Now (Disciple Now) with my church which was very very fun!! No work though. Today was mostly research and some CAD, as I’m working on #printboard a lot now. Trying to get it done 😭
Research: 30 min CAD: 30 min
day 8 - feb 10 ‘25
Printboard!!!!!!!!!!!!!!! Some CAD for this though…
My current printhead setup:
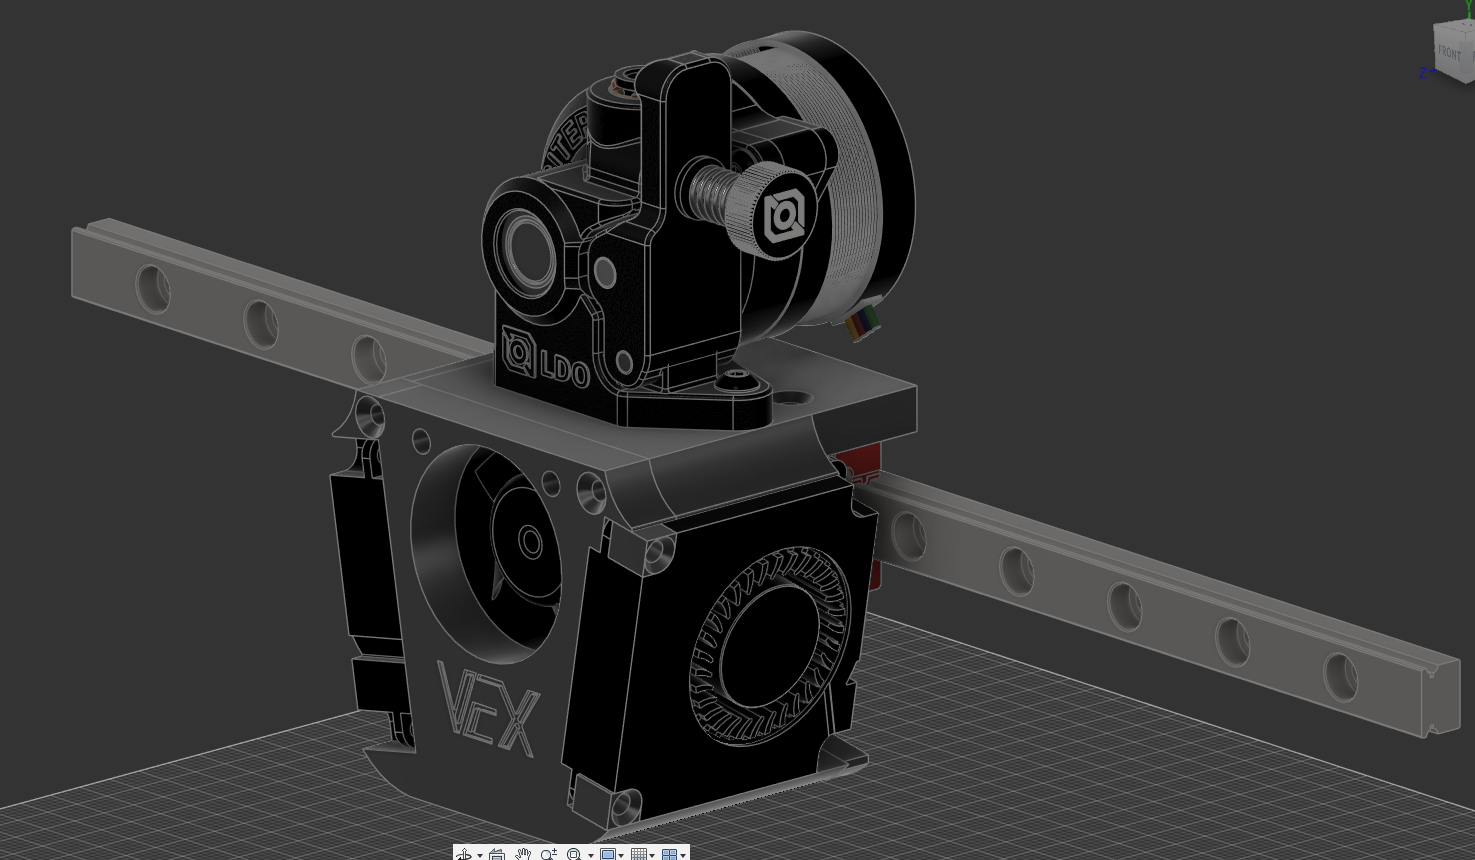
CAD: 1 hr