GreenSpool
Made by: @dave9123
Repository link: https://github.com/dave9123/GreenSpool
Time spent so far: 44 hours
BOM
Important Notes
- PET should not be reused for food applications after printing, as small imperfections may harbor bacteria.
- For industrial re-use, PET undergoes chemical recycling or re-extrusion at high temperatures that fully sanitize and reshape it.
Goals
Day 1 (February 9th 2025)
Today I watched a few YouTube videos on how I can possibly make a 3D printer. Then, I realized about the problem that some of us might be facing—plastic waste (except Singaporeans most likely).
I would like to support multiple plastic types but I started to think, how would the user know what type of plastic are they using?
Data below is taken from Plastic Material Melt & Mould Temperatures by PlastikCity
| Material | Melt Temperature Range (°C) | Mould Temperature Range (°C) | Melt Temperature Range (°F) | Mould Temperature Range (°F) |
|---|---|---|---|---|
| ABS | 190-270 | 40-80 | 374-518 | 104-176 |
| ABS/PC ALLOY | 245-265 | 40-80 | 473-509 | 104-176 |
| ACETAL | 180-210 | 50-120 | 356-410 | 122-248 |
| ACRYLIC | 220-250 | 50-80 | 428-482 | 122-176 |
| CAB | 170-240 | 40-50 | 338-464 | 104-122 |
| HDPE | 210-270 | 20-60 | 410-518 | 68-140 |
| LDPE | 180-240 | 20-60 | 356-464 | 68-140 |
| NYLON 6 | 230-290 | 40-90 | 446-554 | 104-194 |
| NYLON 6 (30% GF) | 250-290 | 50-90 | 482-554 | 122-194 |
| NYLON 6/6 | 270-300 | 40-90 | 518-572 | 104-194 |
| NYLON 6/6 (33% GF) | 280-300 | 40-90 | 536-572 | 104-194 |
| NYLON 11 | 220-250 | 40-110 | 428-482 | 104-230 |
| NYLON 12 | 190-200 | 40-110 | 374-392 | 104-230 |
| PEEK | 350-390 | 120-160 | 662-734 | 248-320 |
| POLYCARBONATE | 280-320 | 85-120 | 536-608 | 185-248 |
| POLYESTER PBT | 240-275 | 60-90 | 464-527 | 140-194 |
| PET (SEMI CRYSTALLINE) | 260-280 | 20-30 | 500-536 | 68-86 |
| PET (AMORPHOUS) | 260-280 | 20-30 | 500-536 | 68-86 |
| POLYPROPYLENE (COPOLYMER) | 200-280 | 30-80 | 392-536 | 86-176 |
| POLYPROPYLENE (HOMOPOLYMER) | 200-280 | 30-80 | 392-536 | 86-176 |
| POLYPROPYLENE (30% TALC FILLED) | 240-290 | 30-50 | 464-554 | 86-122 |
| POLYPROPYLENE (30% GF) | 250-290 | 40-80 | 482-554 | 104-176 |
| POLYSTYRENE | 170-280 | 30-60 | 338-536 | 86-140 |
| POLYSTYRENE (30% GF) | 250-290 | 40-80 | 482-554 | 104-176 |
| PVC P | 170-190 | 20-40 | 338-374 | 68-104 |
| PVC U | 160-210 | 20-60 | 320-410 | 68-140 |
| SAN | 200-260 | 50-85 | 392-500 | 122-185 |
| SAN (30% GF) | 250-270 | 50-70 | 482-518 | 122-158 |
| TPE | 260-320 | 40-70 | 500-608 | 104-158 |
Time spent researching: 2 hours
Day 2 (February 11th 2025)
I found out that plastics can be harmful when it’s heated up. Source:
- https://www.quora.com/I-live-beside-a-PET-plastic-plant-that-was-just-opened-The-smell-in-my-garden-and-home-is-like-an-acrylic-factory-Could-this-be-harmful-to-the-kids-and-myself
- https://www.reddit.com/r/unpopularopinion/comments/vfgs8l/heating_food_or_drinks_in_plastic_and_then/
While PolyLactic Acid (PLA) and Polyethylene (+Glycol) has been classified as Generally Regarded As Safe (GRAS). There’s a lot of uncertainty around the process of additive manufacturing.
Some testing shows that the layer lines are big enough that bacteria don’t hide inside as much as expected. Additionally, it’s not nearly as porous as initally expected. Some soap and water with scrubbing is enough to clean most of it out and a quick wash with a bleach solution can bring it up to almost medical standards.
This does not take into account material impurities. New nozzles can come with a coating (often PTFE) to prevent blobs from sticking. The abrasives in the filament can wear this coating down and while it is safe for food to contact like on a frying pan, the worn down products are not.. It also wears the nozzle and metal particles can end up in the print.
TL;DR: Use a sealer.
taken from: https://www.reddit.com/r/3Dprinting/comments/13mox1x/comment/jkwd5vu/
It’s stamped with recycling number 1 and is considered an FDA-approved food-grade material even after it’s recycled, however; leaching of estrogenic compounds – hormone disrupting chemicals – can occur when it’s reused.
taken from: https://www.acmeplastics.com/content/the-ultimate-guide-to-food-grade-and-food-safe-plastics/
This might mean that I will probably need to have an exhaust system along with an air filter (HEPA?) to prevent the user from inhaling the toxic fumes emitted during the printing and molding. Thus having enclosure would be useful for this project’s goal—which is to support recycling plastic bottles into a filament that can be used to print with. The casing is not really necessary as some plastic types that are used in plastic bottles are quite safe.
Options for the enclosure material:
- Acrylic panels (for visibility)
- Polycarbonate sheets (for heat resistance)
- Metal sheets—aluminum (for durability)
By adding those enclosure, there must be seals in place to prevent the fume from leaking—else what’s the point of the enclosure 😭.
As for the exhaust system, there are some options that I can use or even stack over:
- Coconut fiber (recycling coconut fiber c:)
- HEPA filters (quite expensive ngl)
- Activated carbon fiber
Then having them routed to a filter box or outside—through a window?!—would be a great idea.
Polylactic acid, also known as PLA, is a thermoplastic monomer derived from renewable, organic sources such as corn starch or sugar cane. Using biomass resources makes PLA production different from most plastics, which are produced using fossil fuels through the distillation and polymerization of petroleum.
taken from: https://www.twi-global.com/technical-knowledge/faqs/what-is-pla
Making PLA from organic sources? Possibly.
Time spent researching: 2 hours
Day 3 (February 15th 2025)
Question:
- Should I actually use PET? It emits fumes that are just harmful.
Time spent researching: ~30 minutes
Day 4 (March 18th 2025)
Whoa, what a month since I’ve procrastinated! I’ve had a couple of exams and today is going to be the last day of PAT (end of year exam) but I’ll have some more as I’m 9th grade :heavysob:
Back to designing, for the movement, I’m thinking of using linear rails as they are known for their precision. Aluminum extrusions along with a custom-made cartridge would be great though.
https://www.tokopedia.com/bangunkaryaac/aluminium-profile-20x20-extrusion-panjang-6000-mm
Time spent researching: ~1 hour
Day 5 (March 24th 2025)
Heated bed, this looks real cheap Tokopedia!! (MK2B though)
Time spent looking for items: ~4 hours
Day 6 (March 25th 2025)
I went shopping through Shopee and Tokopedia, again. They aren’t really cheap (ignore the double BTT SKR board as it’s currently on new user discount). Went from Tokopedia to Shopee and vice versa. Not much progress has been done except for parts research.

Time spent shopping and researching: ~2 hours
Day 7 (March 27th 2025)
Linear screw actuator rails are expensive (around $77.53 locally sourced)—yes, metals are expensive to source—and AliExpress doesn’t ship to my country because of government policies so best idea would be to DIY.
Thanks to Rudy on Hack Club Slack for making me realize that it’s taking up most of my budget.
 don’t mind the Obsidian app title, it pops up for some reason
 Source: Rudy on Hack Club Slack
A snippet of my BOM (currency conversion as of 27 March 2025 10:27 PM WIB) which shows that it’s taking more than half of the $300 budget.
| Name | Description | Quantity | Price/Quantity | Total Price | Price/Quantity in USD | Total Price in USD | Budget Usage |
|---|---|---|---|---|---|---|---|
| Linear Screw Actuator Rail | Machifit Linear Screw Actuator Rail with Stepper 300mm for Z-axis | 2 | Rp1,267,980 | Rp2,535,960 | $77.53 | $155.05 | 51.68% |
I also went some parts shopping again today and found some useful links which might be useful:
- https://ratrig.dozuki.com/Guide/05.+Linear+rails/73 and added a power socket, 10 pieces of fuse (Rp 275 each on Tokopedia and 19k on Shopee each with 10 minimum purchases—hella insane!), and 3 micro limit switches (for the X, Y, Z rails to hit so it stops perfectly without breaking the structure).
Time spent: ~4 hours
Day 8 (March 28th 2025)
Did a couple of rough designs on Canva (don’t get me started with Figma, my projects don’t even show up on the mobile app for some reason 😭🙏), kinda had a couple of unsure components like the stepper motor and the additional board (for Klipper Ig, maybe I just want it for taking a video of it printing).
And had some late night help from Ancietus, really appreciate it 🙏 I totally did not jump onto someone’s thread and ended up getting help on it 😜

Recap:
- Want better speed? Spend more money! (this is pretty much it 😏)
- Use stepper motors that withstand 24V, not 12V but I can’t pretty much find one cheap enough (again, money problems)
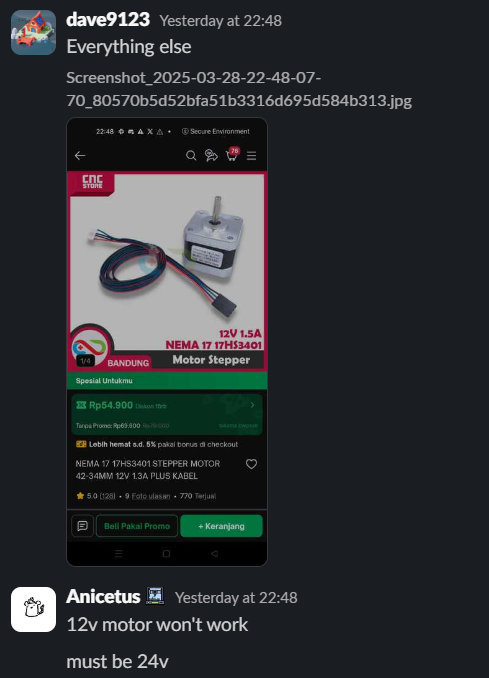
- Spend more on stepper motors (they’re an “investment”)
 or not, my life’s a joke
Time spent: ~5 hours
Day 9 (March 31st 2025)
Got some further ways to save money, make my own Linear Screw Actuator Rail! I found the tutorial video on how it works from Linear Guide and Lead Screw Actuator - Assembly Instruction - YouTube, looks quite nice too (in money terms).
I currently am getting 8 x 30 cm (for the XY-axis) Aluminium Extrusion 3030 Profile and I’m planning on adding the Z-axis, but I’m still unsure because of the Linear Screw Actuator Rail that is still to be made.
Do I need to get a Magnetic Build Platform or just put glass or both? Having a Magnetic Built Platform might be great as they look nice and might help getting the printed stuff off lol 😜.
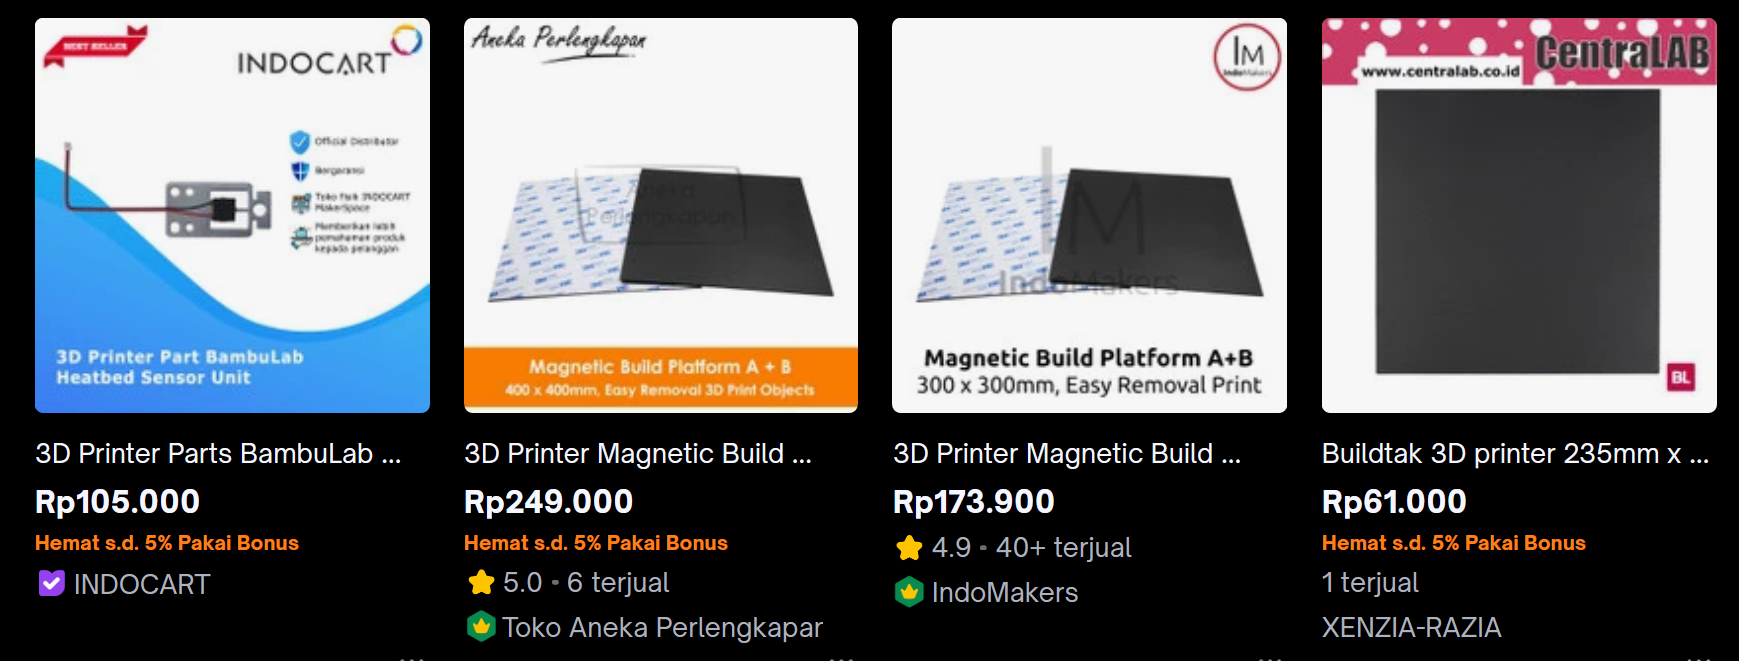
Resources:
- https://www.reddit.com/r/ender3/comments/18gwt6v/glass_or_magnetic_bed/
- https://www.reddit.com/r/ender5/comments/iw2mc4/glass_bed_or_magnetic_sheet/
Magnetic sheet to use :)
Time spent: ~4 hours
Day 10 (April 6th 2025)
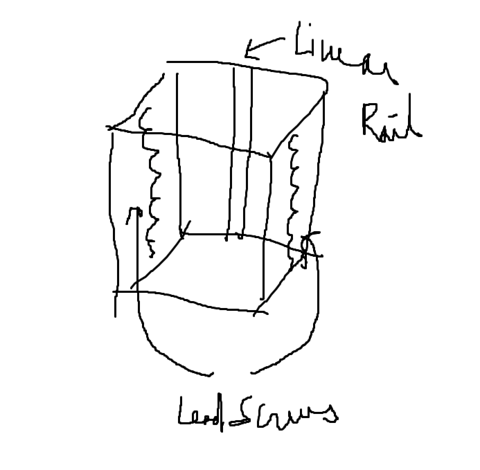
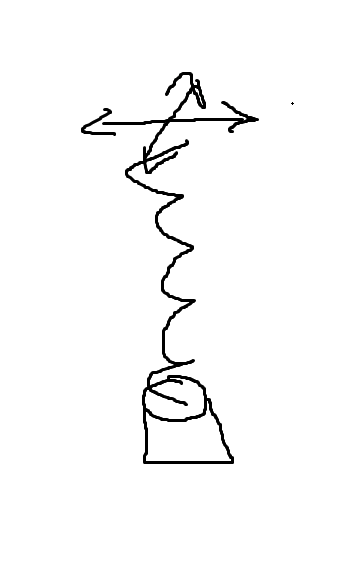
I did a couple of sketches for the past few days:
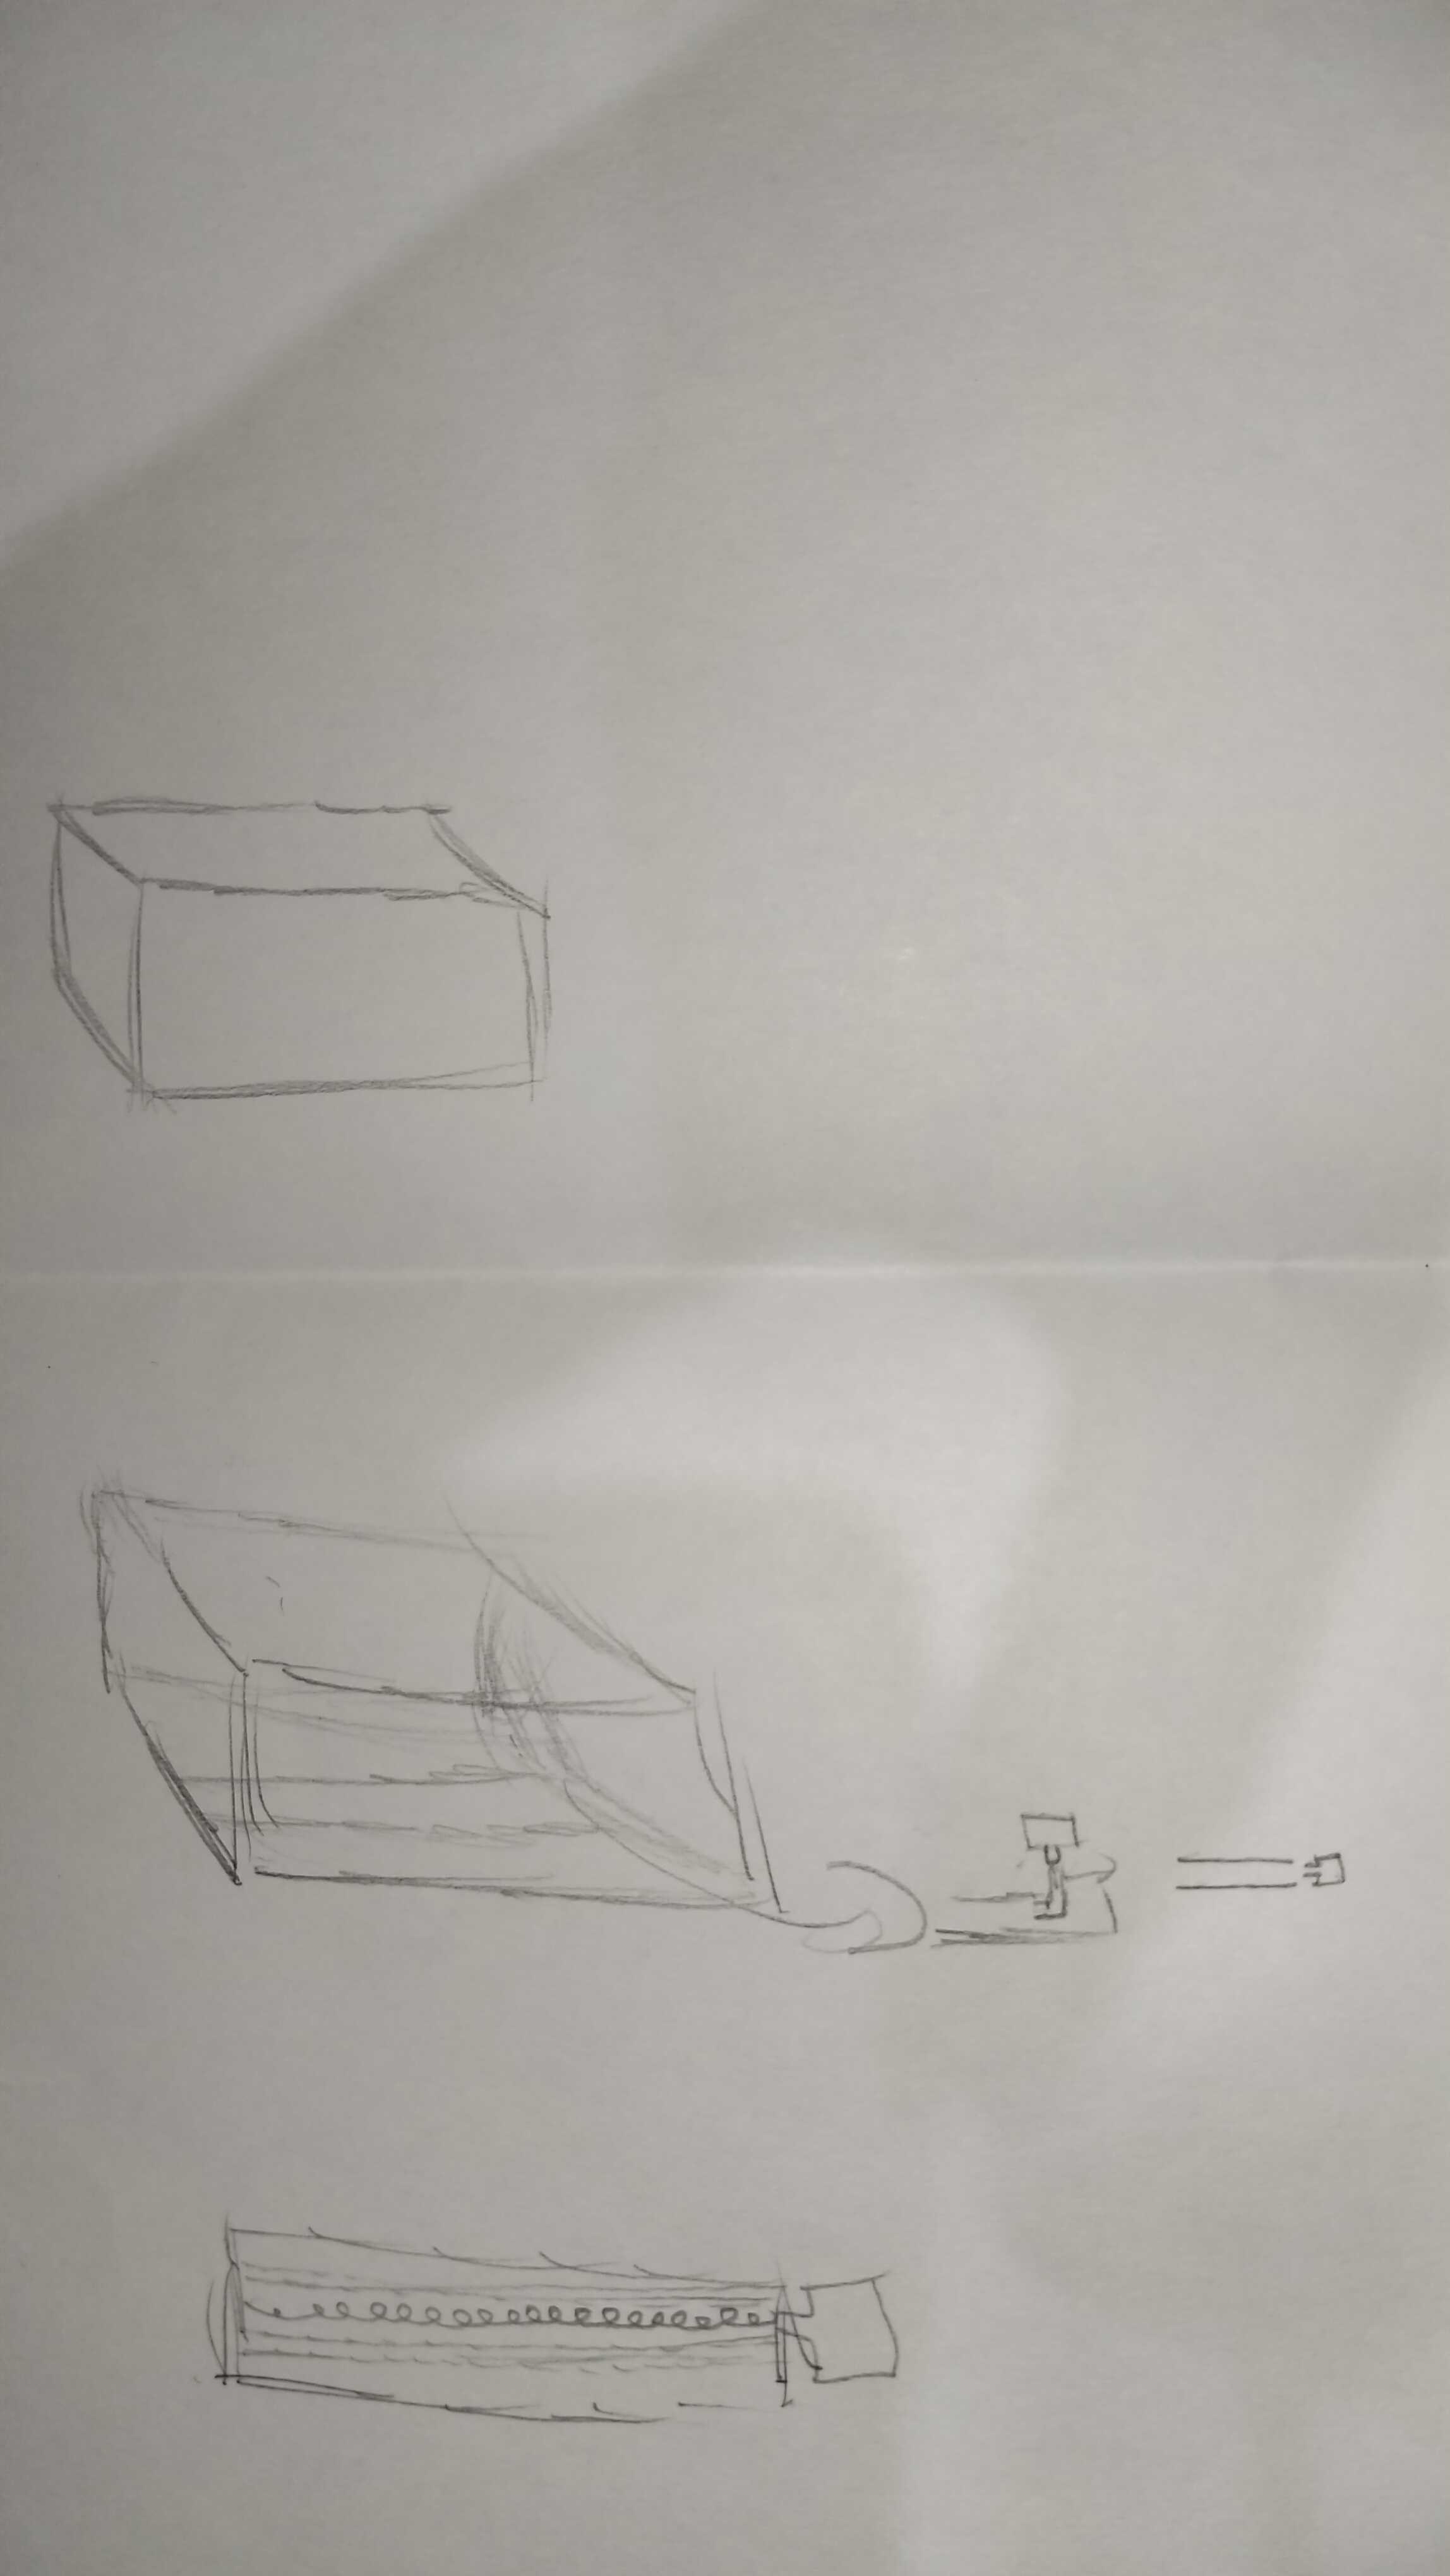
Those pretty much are the rough deal, I’m starting to make the CAD model of the printer. Did some research on pellet extruders and let’s say, the Indian did a pretty nice job for a DIY nozzle and extruder (it’s literally insane).
𝗛𝗼𝗺𝗲𝗺𝗮𝗱𝗲 𝗣e𝗹𝗹𝗲𝘁 𝗘𝘅𝘁𝗿𝘂𝗱𝗲𝗿 𝗳𝗼𝗿 𝟯𝗗 𝗣𝗿𝗶𝗻𝘁𝗲𝗿 / 𝟯𝗱 𝗣𝗿𝗶𝗻𝘁𝗶𝗻𝗴 𝗣𝗼𝘀𝘀𝗶𝗯𝗹𝗲 𝘄𝗶𝘁𝗵𝗼𝘂𝘁 𝗘𝘅𝗽𝗲𝗻𝘀𝗶𝘃𝗲 𝗙𝗶𝗹𝗮𝗺𝗲𝗻𝘁 🧵.
To Do:
- Figure out the movement calibration (CR Touch? BLTouch? Klicky?)—most likely Klicky
- Figure out how to turn plastic bottles into either filament or directly use them
- Figure out the target build volume (sizing)
- Get some railing for Z-axis (left & right) along with XY on top
- Get either a proper hotend (for high-speed) or a budget hotend (again, need money for the plastic bottle chewing functionality 😏)
- Build the CAD
- Complete the Bill of Material :)
- Order everything and being the cheapskate I am, differenciate between providers and shops—the $300 budget is hard yk😜
AvengersAssemble!!
Time spent researching: ~4 hours
Day 11 (April 7th 2025)
Wow, time has gone real fast and it’s H-0 deadline 🤪. Making a plastic recycling is hard atp and people wanted to make Multi Material Upgrade (MMU) on their printer so, why not? It reduces waste for filament spools that are nearly coming to an end.
I’ll probably use PETG knowing it’s great durability.
Printing services I might use, as they’re insanely cheap and pretty quick:
- PLA+ (Tokopedia) https://www.tokopedia.com/kalu-home/jasa-print-3d-pla-printing-3d-cetak-3-dimensi-pla-0-3-fb76b
- PLA+, PETG (Tokopedia) https://www.tokopedia.com/kalu-home/jasa-print-3d-pla-printing-3d-cetak-3-dimensi-pla-0-3-fb76b
- PLA+, PETG (Tokopedia) https://www.tokopedia.com/beauxbutton/jasa-cetak-3d-print-dengan-prusa-i3-mk3s-mini-paket-petg
- PETG (Shopee) https://shopee.co.id/Jasa-Cetak-3D-Print-PETG-Max-180x180x180mm-i.1107284332.27470045329
Useful Resources:
- Try these filament combinations for Multi-Material and Supports!
- ERCF v2, an open source AMS/MMU
- Klicky Probe, a cheaper yet quite accurate bed leveller
To do:
- Figure out ERCF and Klicky Probe
- Figure out how to turn plastic bottles into either filament or directly use them (or don’t)
- Figure out the target build volume (sizing)
- Get some railing for Z-axis (left & right) along with XY on top
- Get either a proper hotend (for high-speed) or a budget hotend (again, need money for the plastic bottle chewing functionality 😏)
- Build the CAD
- Complete the Bill of Material :)
- Order everything and being the cheapskate I am, differenciate between providers and shops—the $300 budget is hard yk😜
AvengersAssemble!!
Time spent: 5 hours
Day 12 (March 10th 2025)
Haven’t had much progress recently, had a couple of book readings hihi 😉. I’ve decided that I won’t do everything all at once and focus on something at once. I’ve studied for tomorrow’s test and here I am continuing my build at 9 pm :) P.S. By the time I wrote this, I forgot my sports attire and therefore fetched them and put them inside my bag 🤦♂️
Even though I have a Fusion Students license, I kinda need to do it other than my main laptop like on my phone connected to a remote desktop. Btw, thanks Jim, I really appreciate it!
I haven’t figured the Z-axis yet as of now, but I’ve gotten some inspiration from the printers other people has made—belt with smooth rods. Also regarding extruder, I can either use Orbiter V2 (highly recommended in the 3D printing community) or design one myself and risk stuff out—one of the dependants on speed.
Time spent: 30 minutes
Day 13 (May 15th 2025)
Wow, it’s been a while since I’ve continued this printer due to known reasons, exams and lack of motivation 😇. Now that general hardware ysws Highway to Undercity is here and with a great looking budget, it’s time to resume our creation with Fusion—I’m not going to learn a new CAD app today for sure.
Useful resources:
Done:
- Added Klicky Probe to the BOM and now I’m crying even worse
Time spent: ~2 hours
Day 14 (May 16th 2025)
Useful resources:
- https://www.youtube.com/watch?v=p3ZIM3megIU TL;DR use 50% flushing multiplier
I did nothing much except watching YouTube videos on 3D printers, sadly.
Time spent: 2 hours
Day 15 (May 17th 2025)
I figured out yesterday during class the most effective way to deal with multi filament printing. It is joining the tubes so that the filament can push each other in case the filament isn’t enough to be pushed by the Bowden setup or the extruder which means I’m going to need a few extra stepper motors (like maybe 2) for the multi filament system.
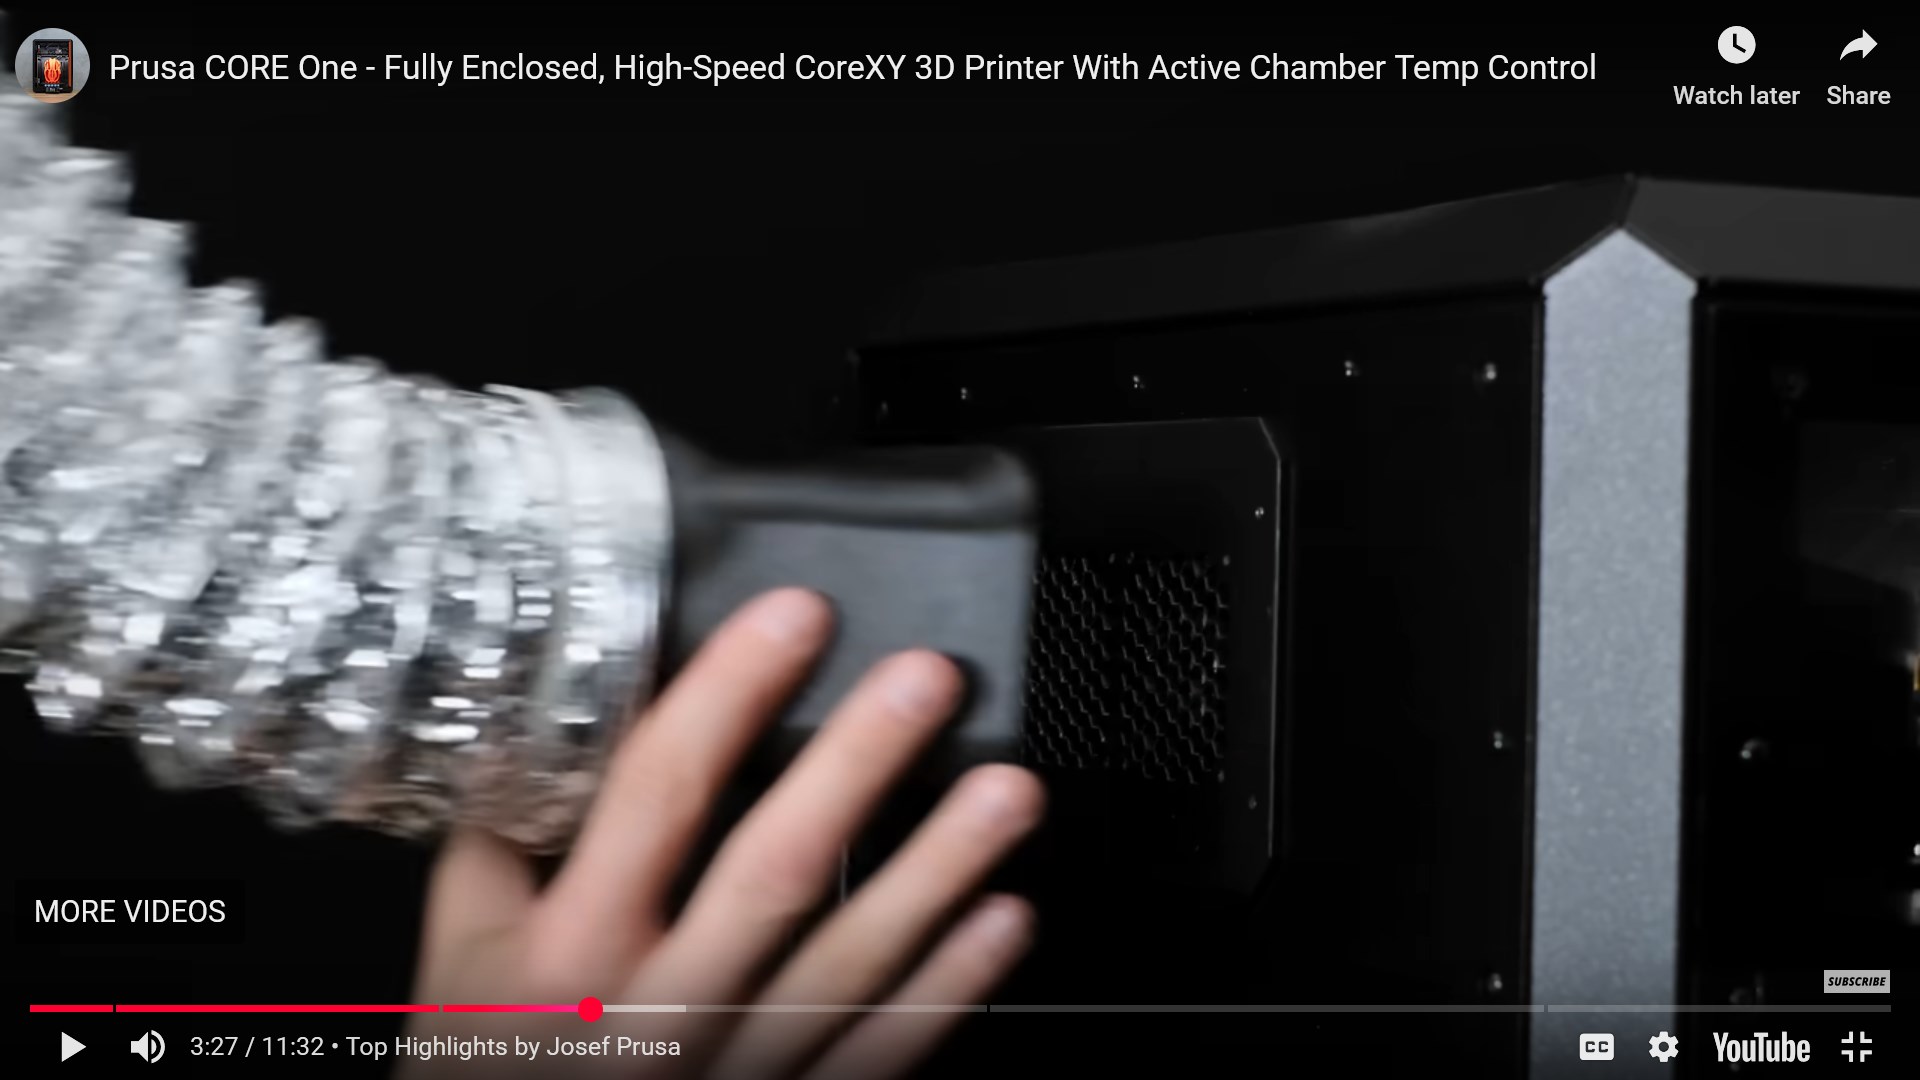
Today, I’m planning on figuring out the best way to create an enclosed 3D printer as enclosed are not well documented on the internet as of my research.
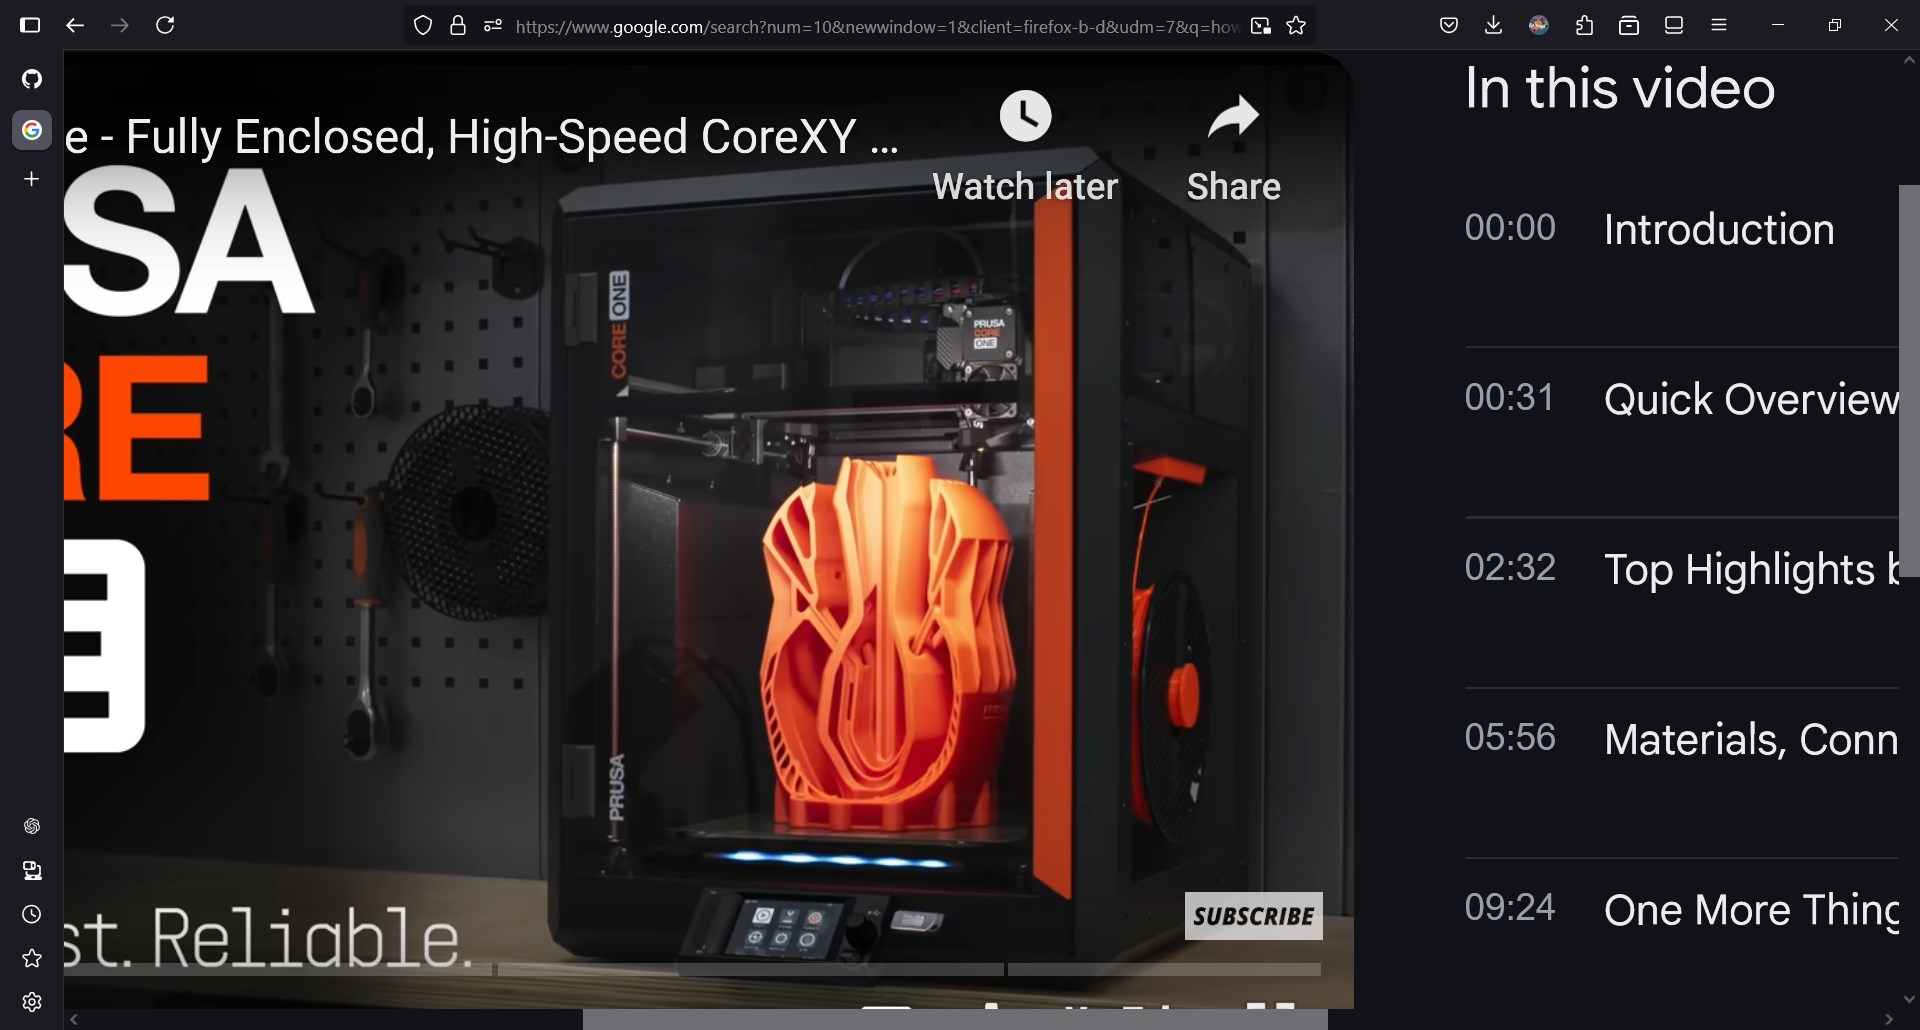

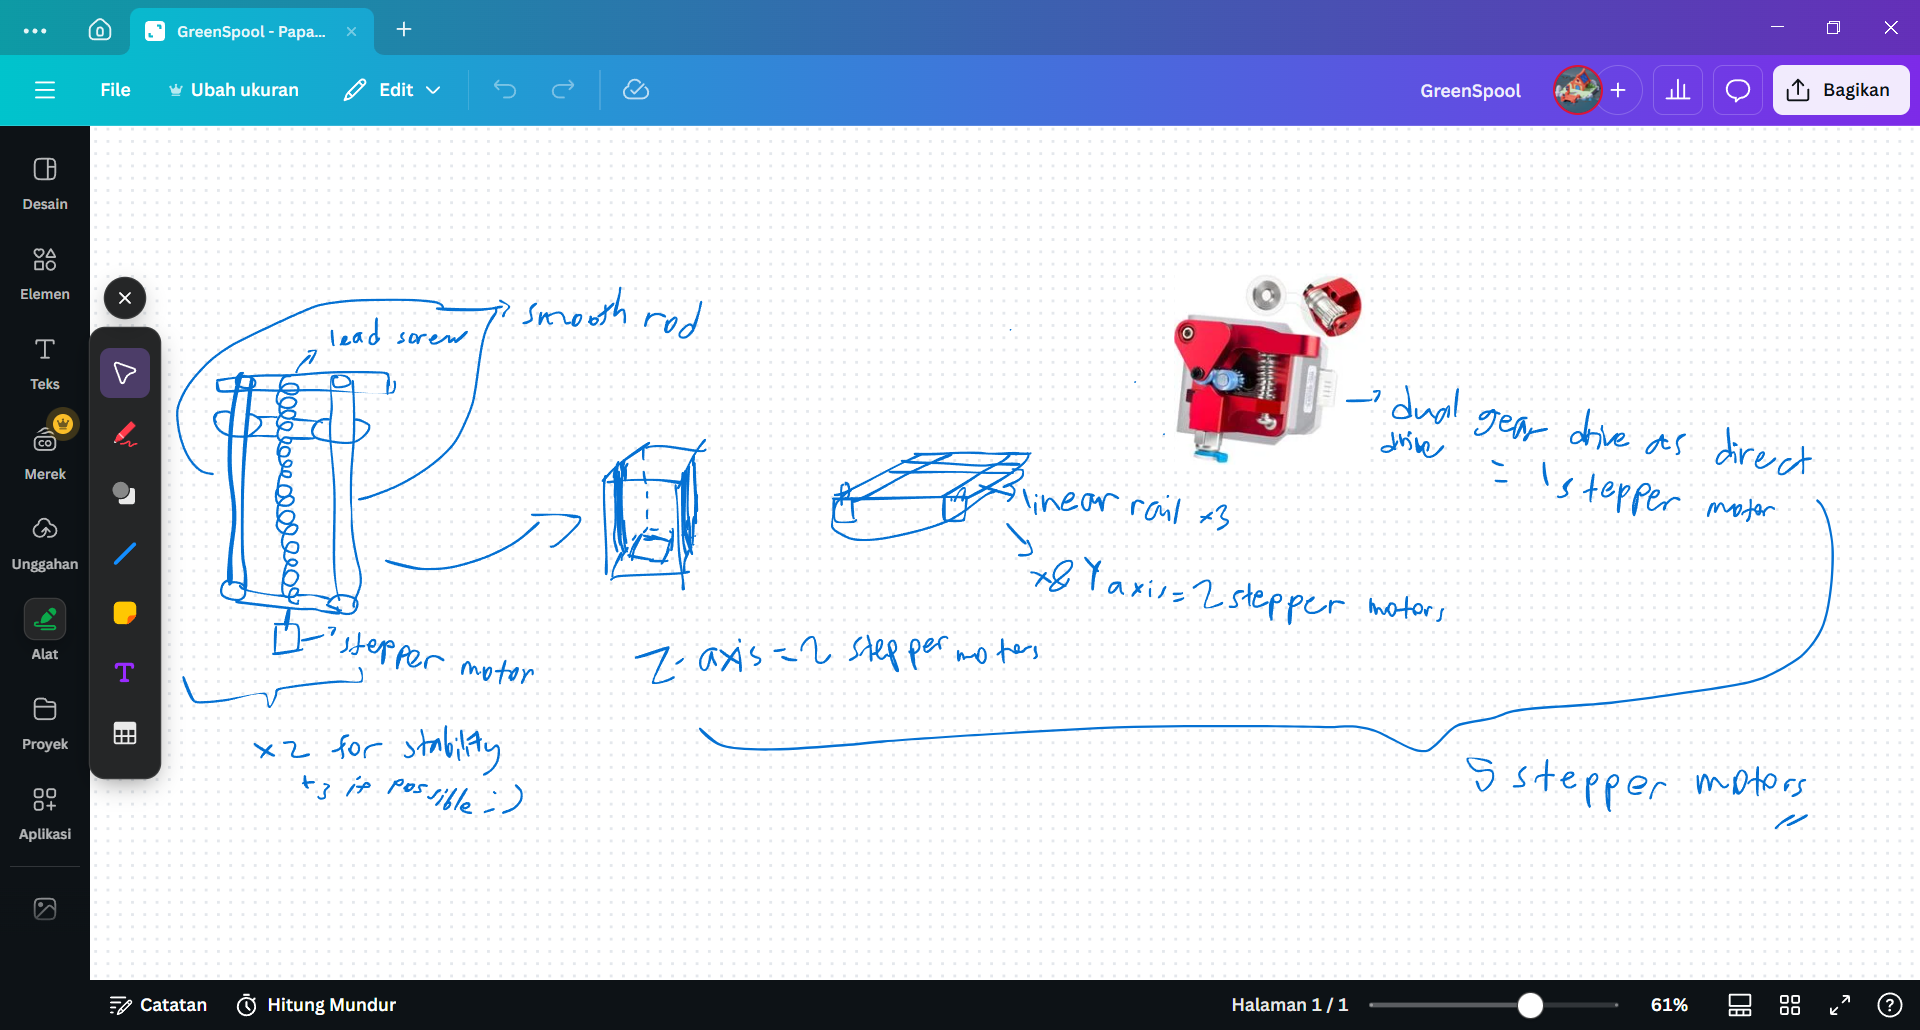
 Totally not me trying to figure out how did they have the printer structure set up by looking up on their design. They all have something in common, no linear axis (because they are just incredibly expensive lol). Instead, they use 3 threaded rods or linear screws with either motor controlling each of them or gears, I can’t figure that out as I don’t have one in hand 😭.
Regarding motor controls (as I’m going to be controlling a huge amount of motors), the BTT SKR 3 (which I’ll use) natively supports 6 stepper motors which is probably enough if I’m going to use 1x Z-axis (or maybe 3), X movements, Y movements, 2x for multi filament. Using belts is possible to save money but like we love great control 😉. Maybe belts though, as $350 budget is already tight as it is.
Also the EXP-MOT is like $7.62 on Biqu Equipment and Rp 170.000 (about $9.69 as of today) on Tokopedia.
| Tokopedia | Biqu Equipment |
|---|---|
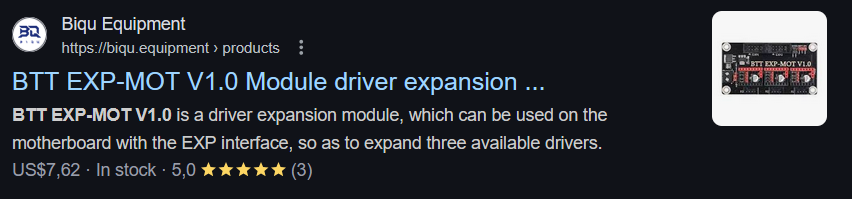 |  |
I really love talking about money as if I have a lot of money to spend on this project, what a sad life /j
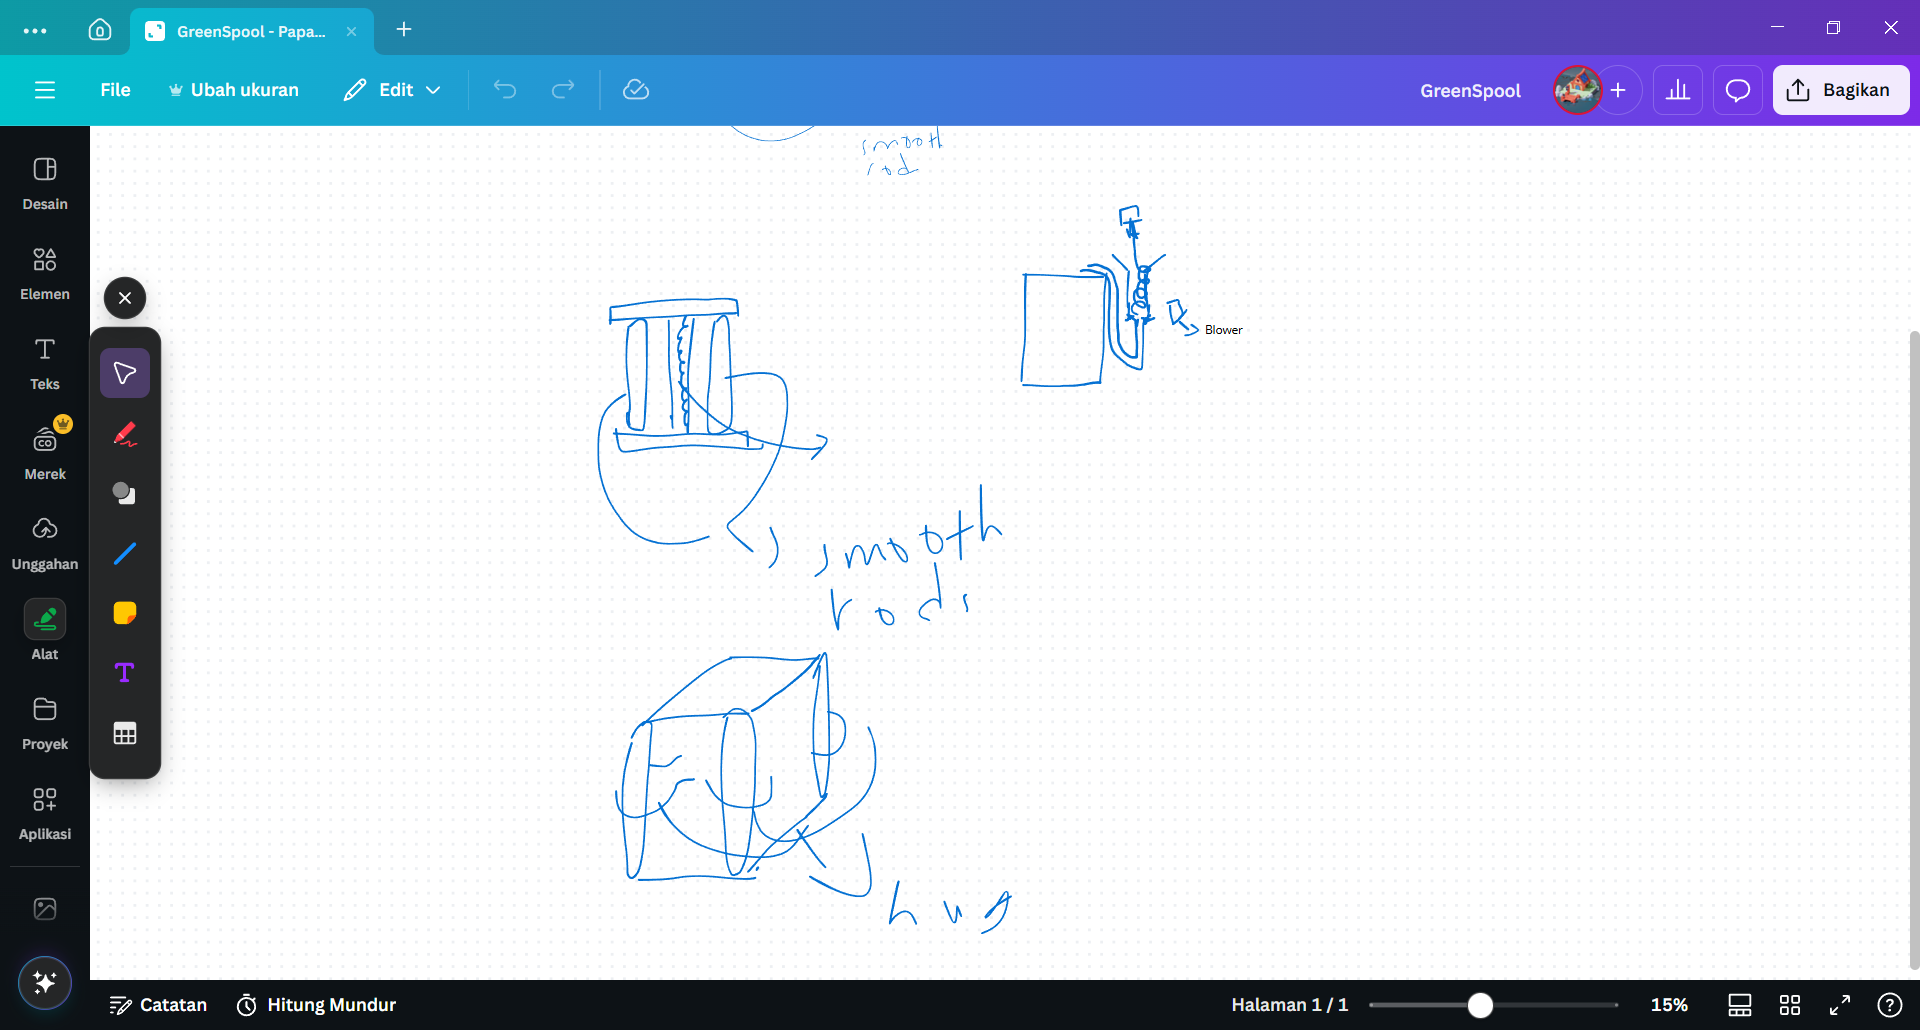
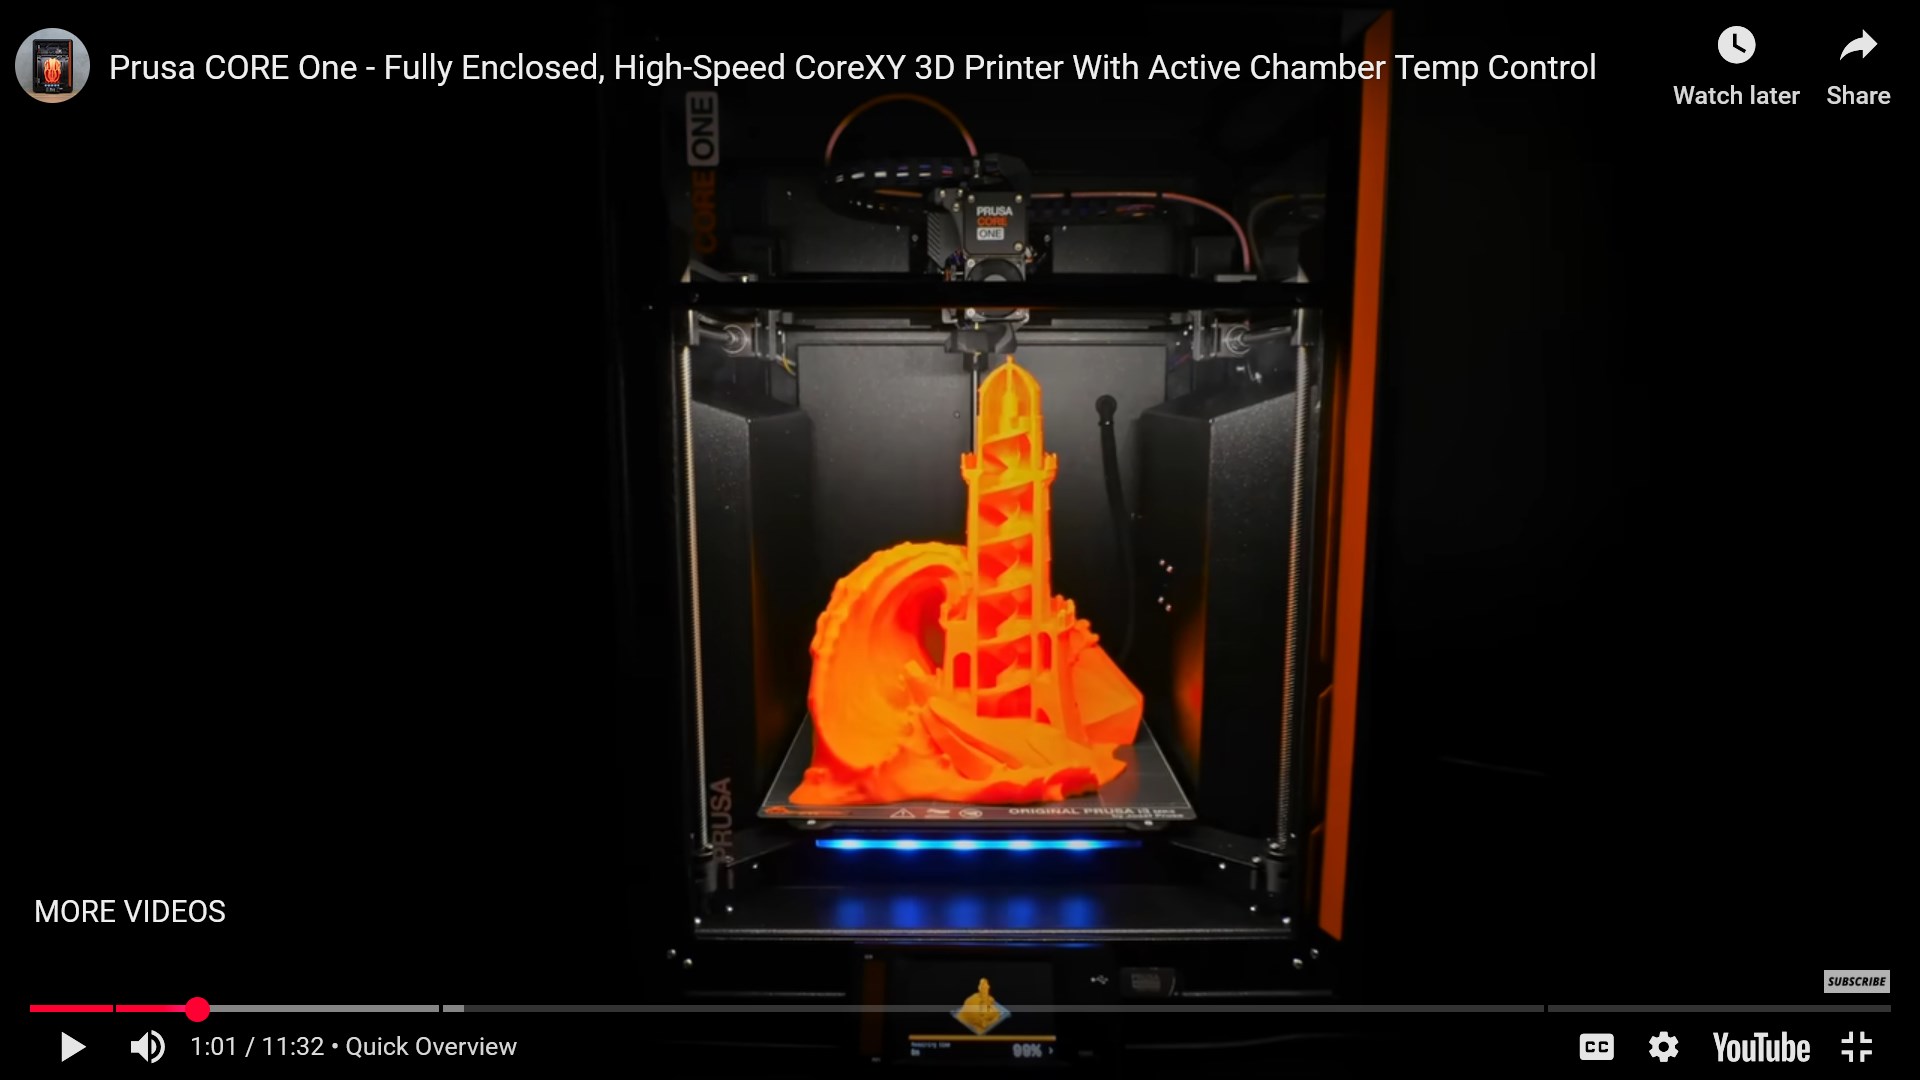
 Wow printer got air vents to prevent user from inhaling the air inside the printer.
 They literally even got a holder for the filaments? Wow that’s insane
So as for the door, they use a high-durability polymer which is safer than glass because it’s nearly indestructible. The entire XY gantry is made of steel as combining different materials such as steel and aluminium would lead to thermal expansion.
Time spent: 2 hours
Day 16 (March 18th 2025)
It turns out that it’s called linear screw/ball screw for the Z axis, not a threaded rod but threaded rods seem to be a cheaper alternative.
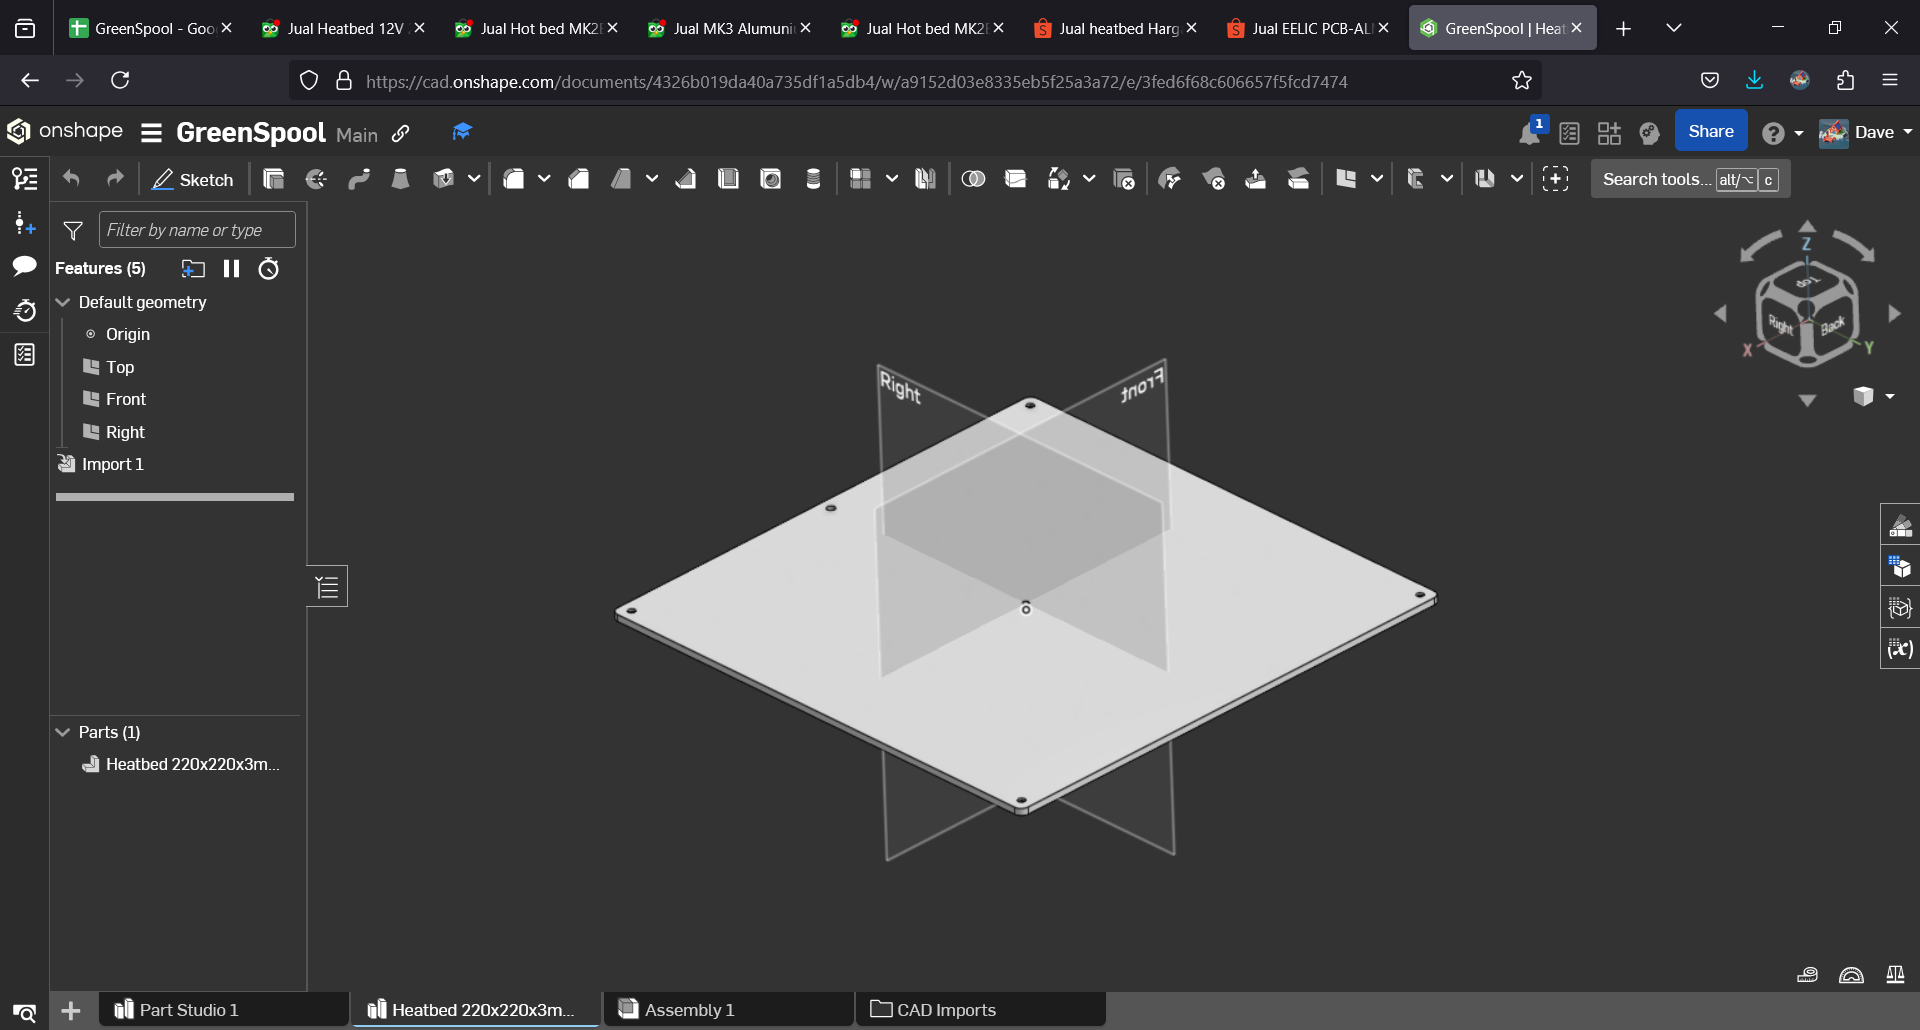
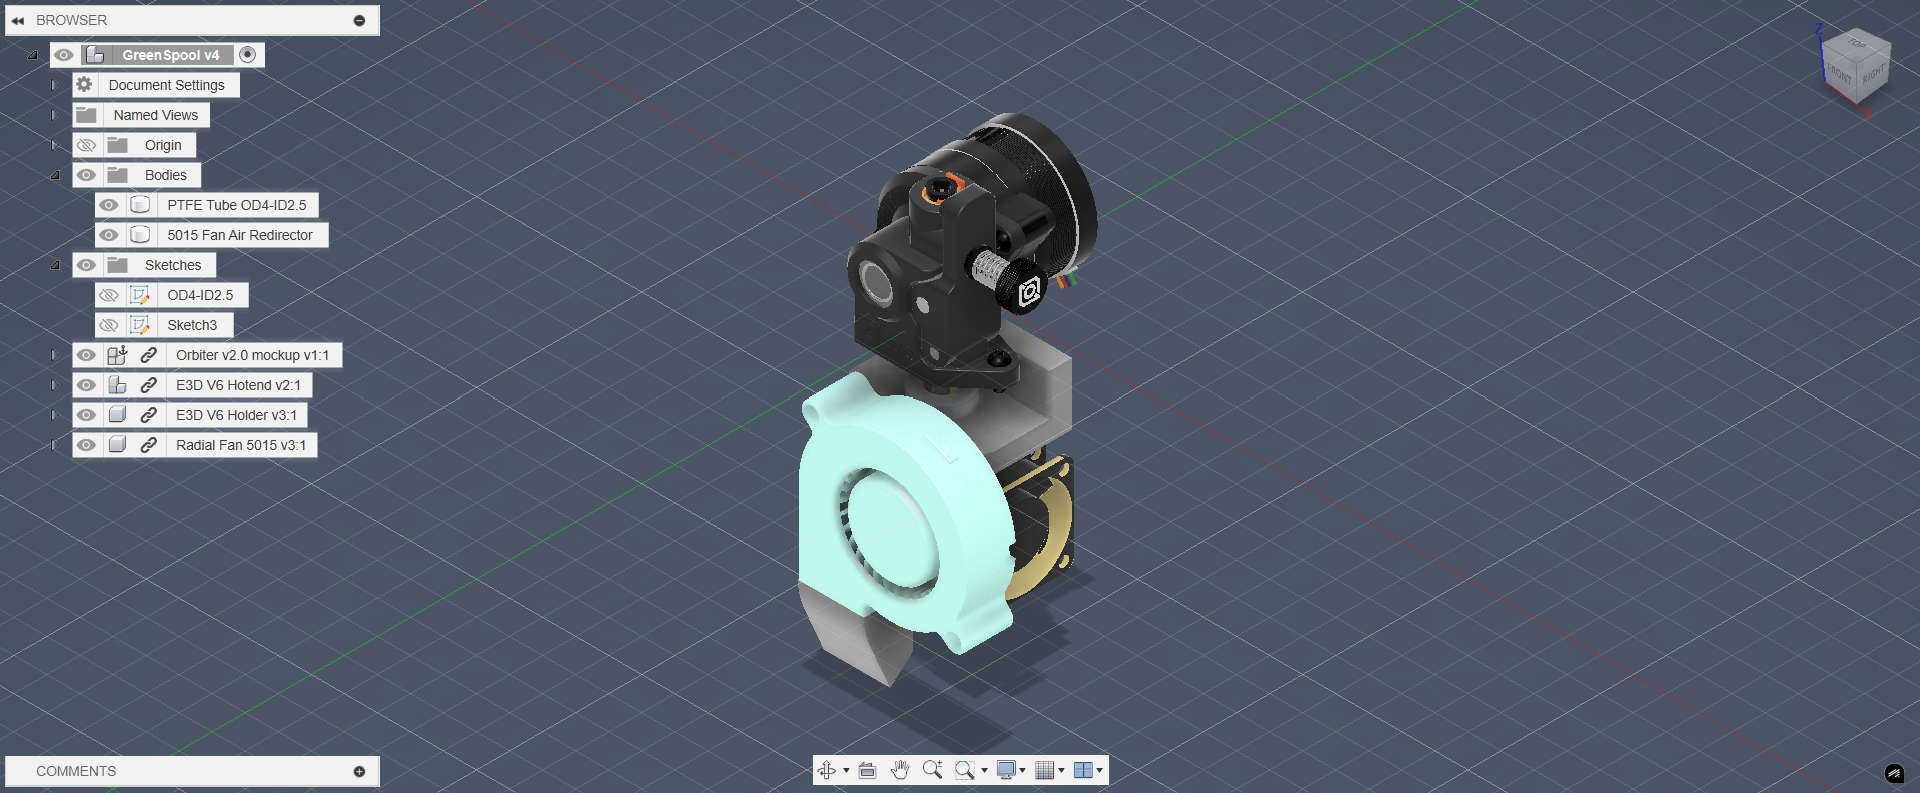
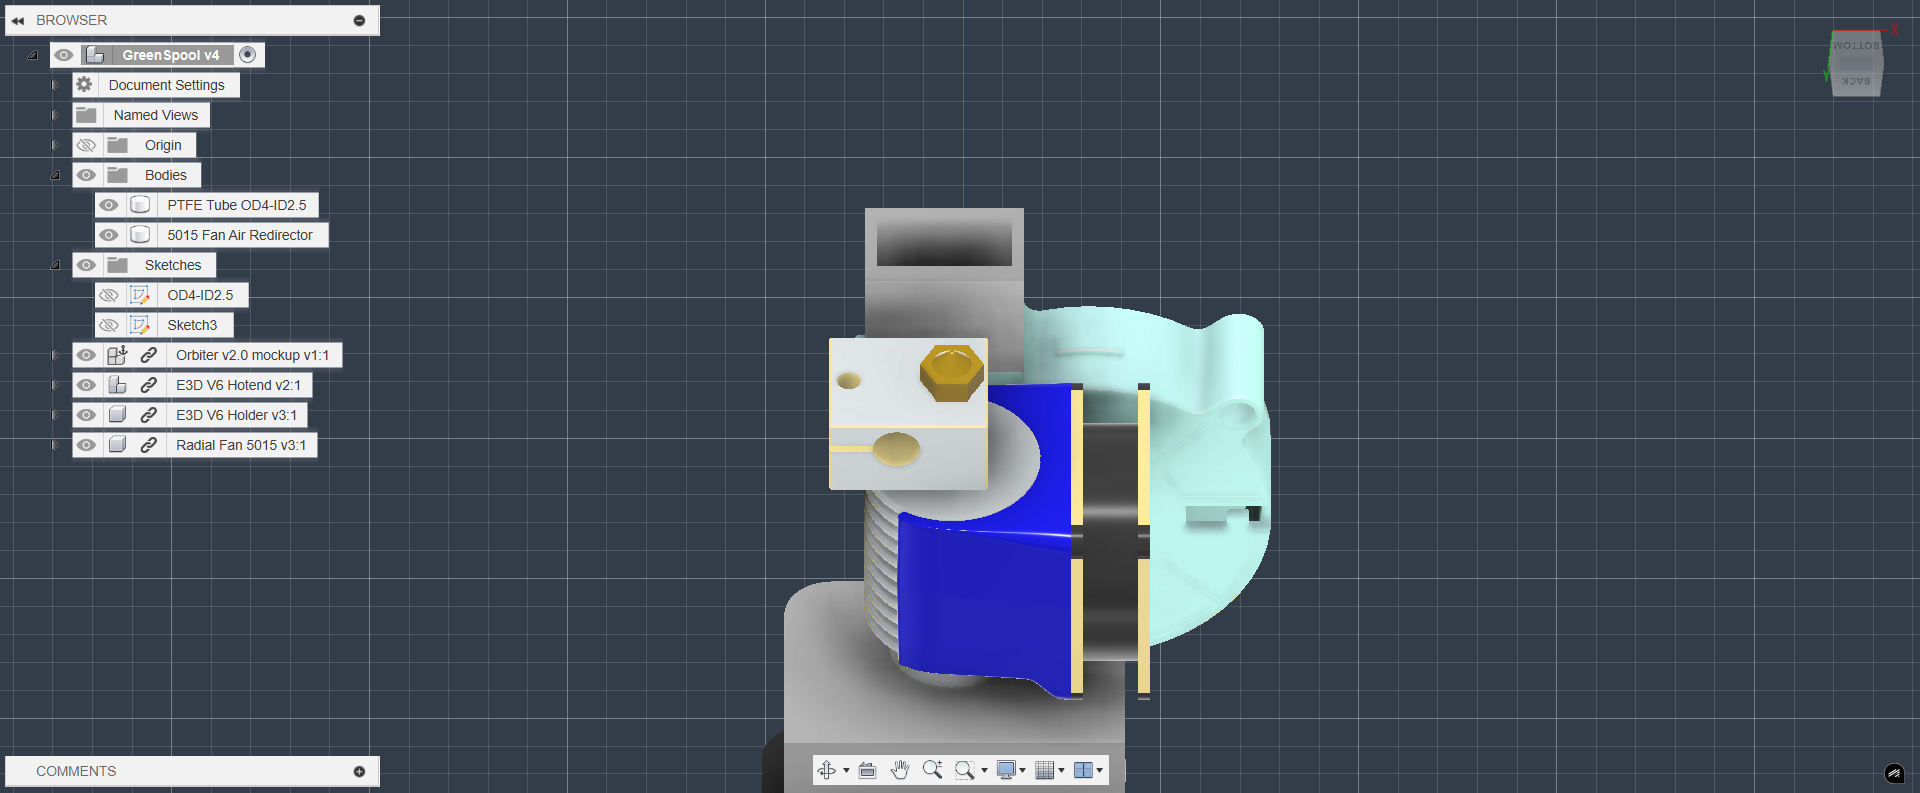
Glad to announce that I started doing CAD! I looked for 3D models and have added the Orbiter V2 extruder and the E3D V6 hotend along with its bracket.

Time spent: 2 hours
Day 17 (March 19th 2025)
Did some CAD, made a 5010 radial fan air redirector along with some parts research.

Time spent: 3 hours