Printopus
Printopus The printer with everything you need!
Made by: Atharv Sharma aka scattercat_123 | Slack id = scattercat_123
Repository link: Click mE!
Total hours so far: 75+
Before we Start!! :
What is special in this printer:
- Auto bed leveling
- Working on adding a filament dryer mount in my printer with a bowden setup! First of its kind.
- Auto Print remover + cleaner with servo!!!(i will add the wedge later so that i will know the bed height before adding it) -------------------------------->
- Input shaping mounts added with adxl343 accelerometer
- No more Z-Banding(dont ask me about my old printer z banding) I have added Aluminum Flexible Jaw Spider Shaft which reduces the chance of z banding.
- My printer looks sci-fi with a Sci-fi Themed PRINTER HOLDer!! woohoo
If you are wondering how i will add my filament dry box i have already cut a hole in the dry box to fit my bowden setup

yeah since i am using bowden i will cut a hole in my filament dryer and mount it sideways next to the bondtech extruder! I have already cut the hole lol
Day 1 (13th Feb 2025) :
Total time 1.5 hour!!! Started from 6pm
1st 30 mins Off to a great start!
I researched many printers I could make including this one for the basic idea -
The other 1 Hour
Researched some more parts and…
I made this mindmap for my printer 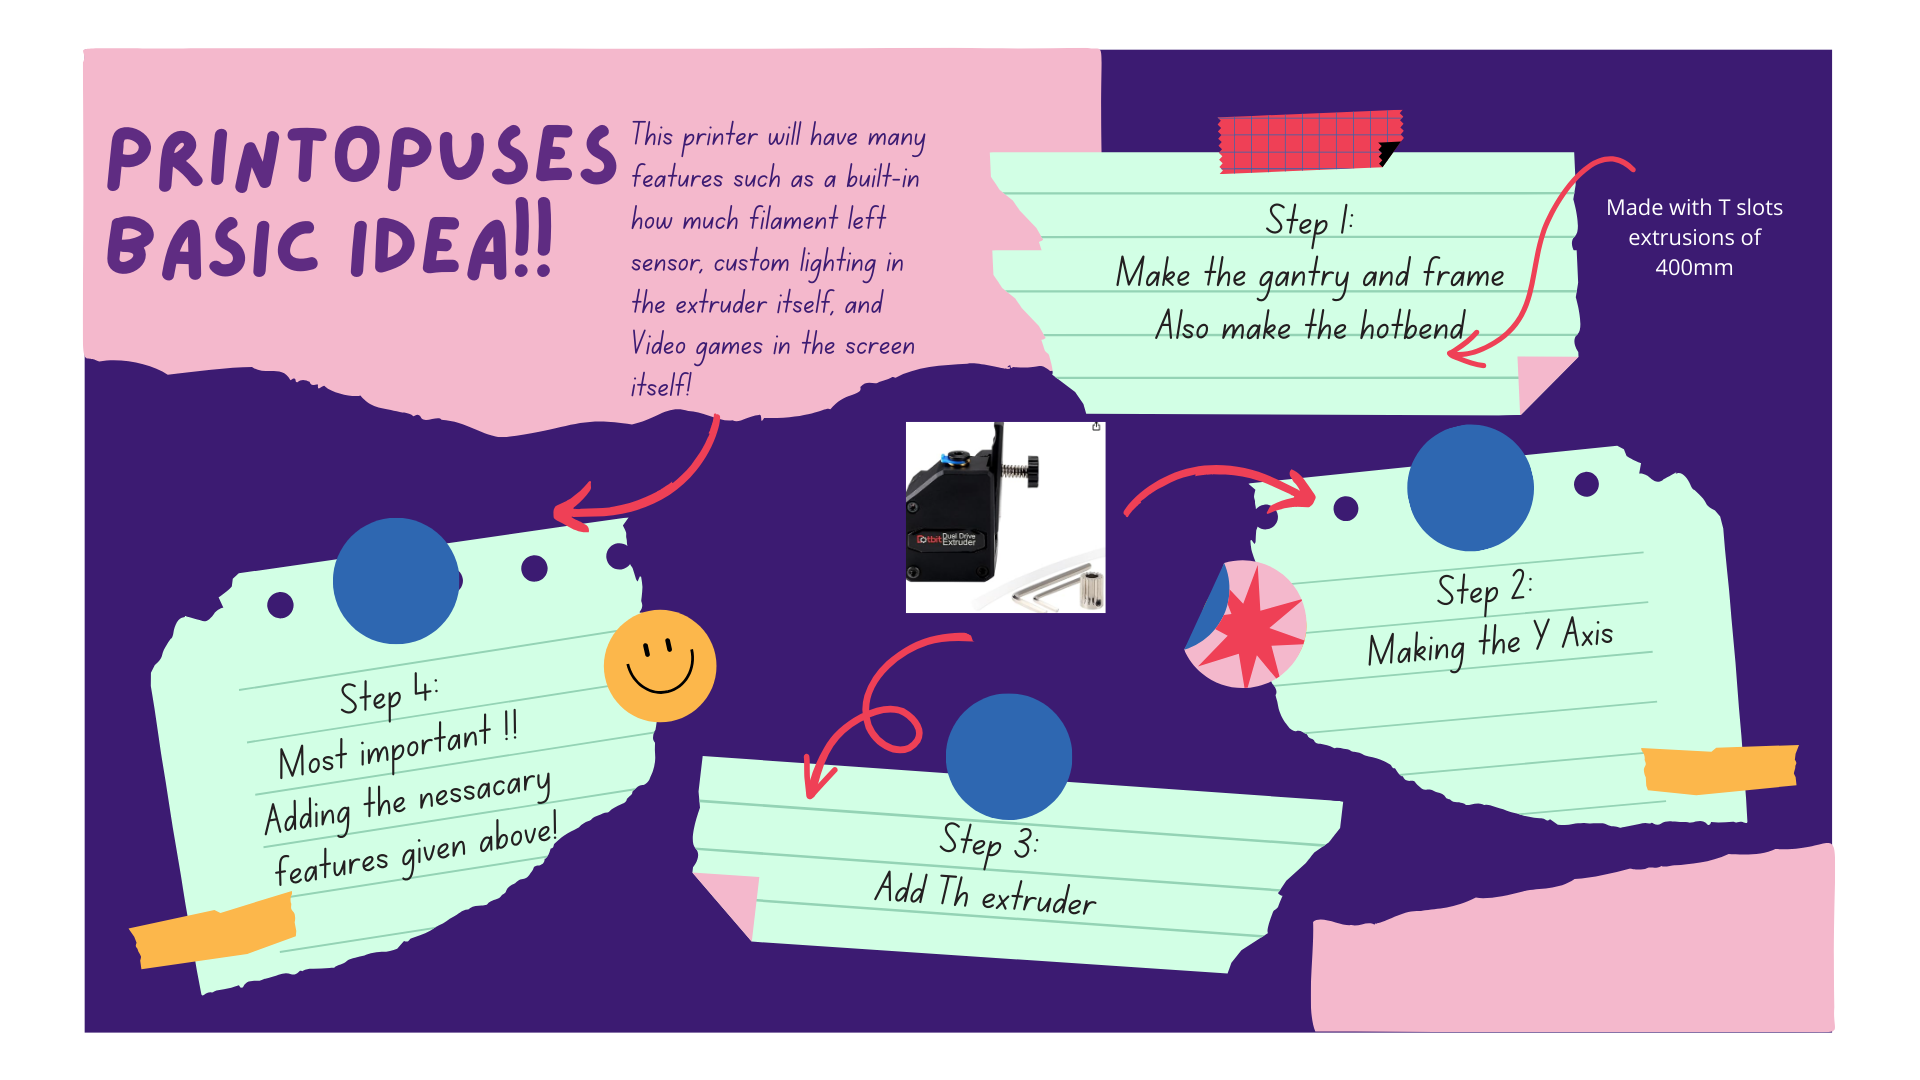
And this is the end of DAY 1!! I am so sleep deprived :(
Day 2 (14th Feb 2025) :
Total Time 2 Hours!!! Started from 3:15 pm
Designing and finding the frame! I am using some extrusions! I researched for a long time.. Not kidding :( Time for extrusion frames cheap and good quality with fast shipping and I found these- https://www.3dprintronics.com/products/aluminium-extrusions Researched the SKR Mainboard - https://robu.in/product/bigtreetech-skr-v1-4-control-board/?gad_source=4&gclid=CjwKCAiAk8G9BhA0EiwAOQxmfhkp0i08jJYeySLA4vNOAmef0a8bFC9ivwNMua4mY5DsqRokWoi2nBoCKCMQAvD_BwE I had to figure out how does UART Stepper motors are compatible with it also. The motors(stepper) - https://robocraze.com/products/17hs4401-nema17-stepper-motor-40mm?variant=42490709246176&country=IN¤cy=INR&utm_medium=product_sync&utm_source=google&utm_content=sag_organic&utm_campaign=sag_organic&campaignid=21586511453&adgroupid=&keyword=&device=c&gad_source=4&gclid=CjwKCAiAk8G9BhA0EiwAOQxmfgMX85uQqnOZMAvCdYdmVo2krWNdqP1vCMUg88csETRoiRnmNA9iIxoCtbAQAvD_BwE
Day 3 - High Fever 🤒
Day 4 (16th Feb 2025) :
Total time 4 Hours!!! Started from 1 pm
I had to research the skr board first because many pins are very confusing. I decided to go with the btt skr v1.4 board and I found this very useful link - Official site info
Surprisingly you also get a rubber duck! yay!
 Also THANKS A LOT to whoever made this video
https://www.youtube.com/watch?v=hRpWtx3HCGM
Also THANKS A LOT to whoever made this video
https://www.youtube.com/watch?v=hRpWtx3HCGM
It helped me choose the stepper motor drivers because I did know if I needed uart and what jumpers I needed to use on the board! This is very confusing. I am also using a touch screen - tft24
Now I have lots of things on my mind that I have to buy so I decided to start working with the bom sheet!
Here is the unfinished work of the spreadsheet: https://docs.google.com/spreadsheets/d/1NrEE28tm0ULvl5nzLH3Xo_gENOVdaQEKzp27CuxsBW8/edit?usp=sharing
Day 5 (17th Feb 2025)
Total Time 2 Hours!!! Started From 2 pm
Started to update the BOM
Researched about the Bowden style extruder and where to buy them.
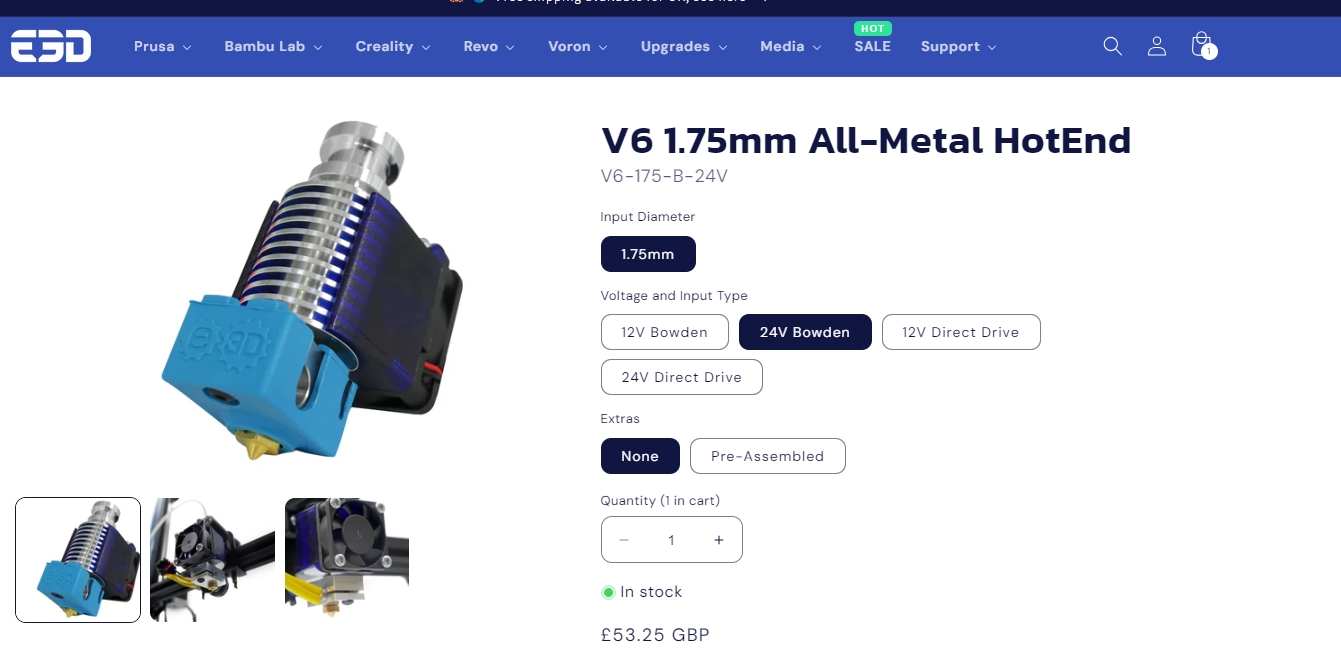
I will be using A V6 Hotend:
I will be using a dual-drive extruder:

Day 6 (18th Feb 2025) Fever 🤒 Still there :(
Total Time 1 Hours!!! Started From 2 pm
Added many things to the BOM! I found many cheaper sites so I had to update them all! Did many other stuff
Day 7 (19th Feb 2025) I am feeling better than before!
Total time 2 Hours!!! Started from 1 pm
Today I started working on the 3D model of my printer since I was bored to hell updating the BOM every day!
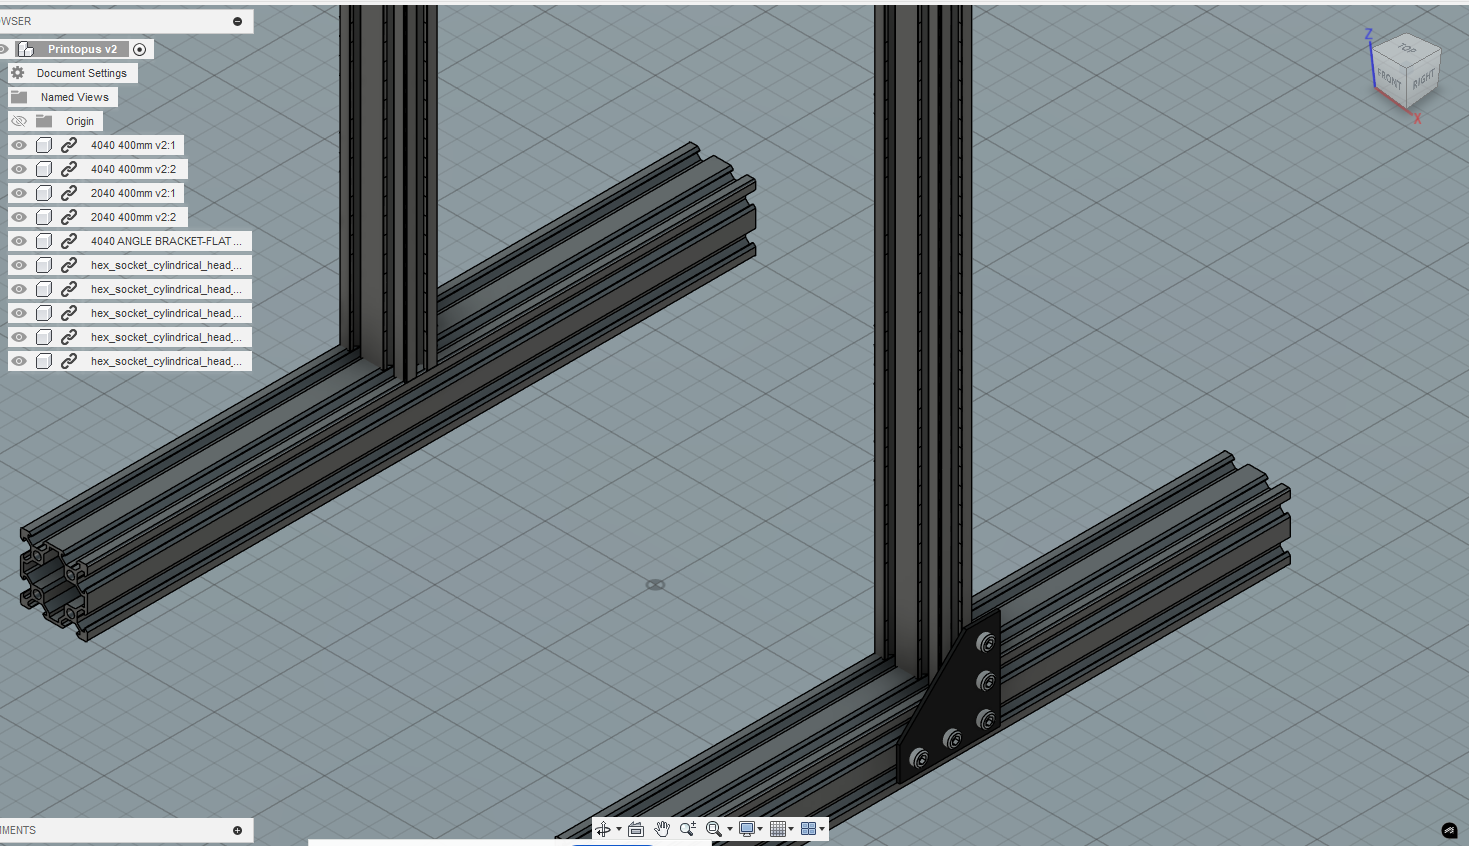
First, I needed to design the 4040 Extrusions! Luckily I found them on GrabCAD. Now I will make the Frame
Yeah, I had to watch so many tutorials and I was doing everything manually debugging a lot. Now I realize how bad I am :(. But I still made it!
Day 8 to 19 (20 to 13th March 2025) Sorry to lazy to write everything!
Total time 9.75 Hours !!! 45 mins Everyday (i had to make a routine bruh)
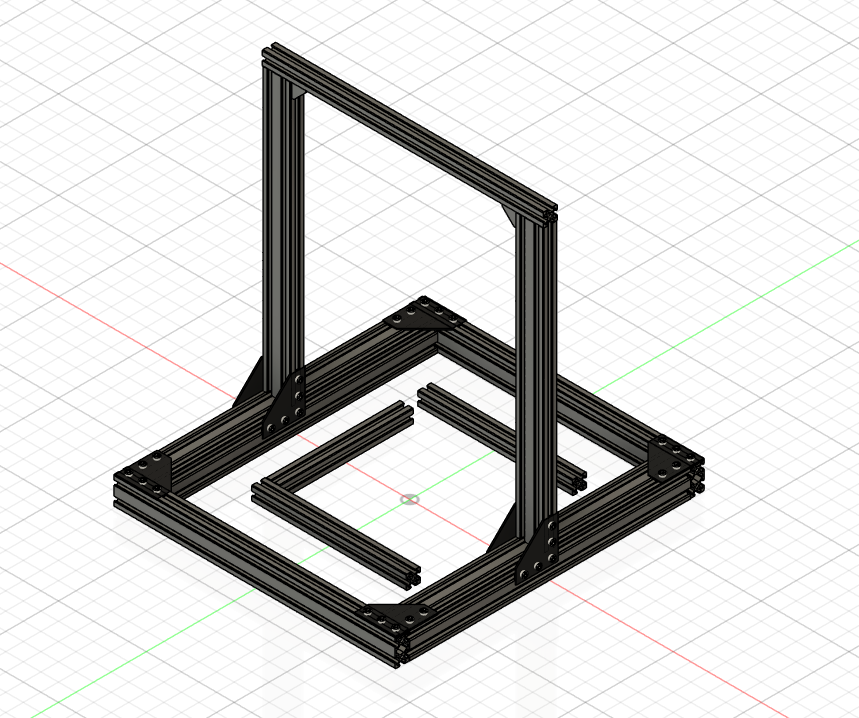
I worked on the cad files every day and since I am a noob in fusion it took me some time to make the final result of the frame with the heated!
I made this till now NOT DONE!
I will soon upload the newer cad file!
Day 21-34 (14th March to 27th March 2025)
Total time 28 hours 45 mins(i grinded)
Yo guys, wassup Ik i haven’t updated for a long time since my parents only gave me 45 minutes to work on this cause I have exams, and I am trying to finish everything before my main exams come!!!
SO THIS IS THE UPDATE! I added input shaping mounts for accelerometer! I havent built a printer so this is a big thing for me so In the last few days and these days I WATCHES VERY VIDEO on this series - https://youtube.com/playlist?list=PLP-VDZmS6bFo6qyPS8MyBFKqepQHpjCEB&si=mJB7cQvZAObcFmbE Because why not I am definetly usng this mainboard and since we ARE GOING to RMRRF which have people building cool stuff like 6 second nozzle changes even I wanted to ttry to implement something cool. Hence, I needed to know what my mainboard could do!
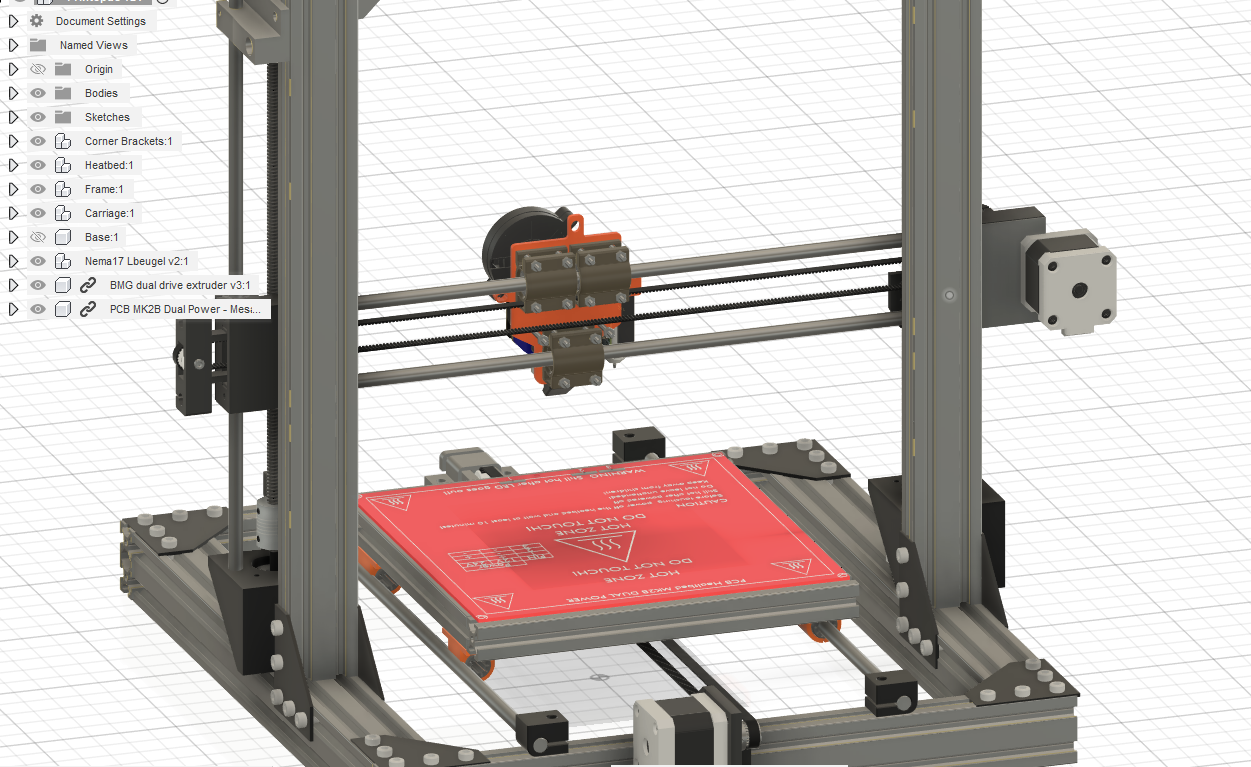
Now for the main updates i did today is I FINISHED THE Y AXIS (and i have become noob -> master in fusion 360) <- wow so cringe And Yeah i did everything manually I DINT even KNOW AALIGN TOOL EXISTED. I ALWAYS MANUALLY Made everything fit together. But now I am done with the y-axis. I promise everything will be faster from now on because I’m like 70% done less goo.
Here is a photo of what I finished

And also i have almost finished my shitty BOM here is a sneak peek: <img src=“https://hc-cdn.hel1.your-objectstorage.com/s/v3/f460a81e4a50cfa1f8710232cfcd2f73e88b81fe_image.png”
I don’t know but my fusion is definitely not organized, bruh :(

Thanks, ppl more updates soon! Sneak peak: working on a good PCB
Day 35 (28th March 2025)
Total time 4 Hours
Hi guys, I know i havent updated this for a while but I am:(drumroll)
working on my printer to be sci fi themed
99% DONE WITH MY CAD FILES I have started with my pcb for the neopixels and the bom please dont talk about it I Need too finishs the bom when i am done (it will be a pain)
Now for the pcb i am using klipper with Skr mini e3 v3 and neopixels I found this helpfull link which i might chekc out later on : https://www.reddit.com/r/klippers/comments/rdbmp2/klipper_neopixels_on_skr_e3_mini_v2_working_how/
I wanted to change colors like for heating: orange for error:red for printing:bluish pink and for leevling or any equipment test :green
I might add more later on like for moonraker timelapse each time it takes a photo the blush pink changes to white for a clear photo.
Here is my almost finished printer cad( i have to do the electronics storing base ):


I know it looks a bit ugly but after building its going to be 🔥
Thats all for today maybe tommorow and later on i will give more updates and phoos aobut the pcb since my exams are officially over.
Day 36 (29th March 2025)
Total time 4 Hours
Hi Ppl I have designed the first layout of my pcb and also learnt some kicad. I researched a lot on how to wire a capacitor but couldnt get any info for neopixels. So in this pcb v1 I have done everything without capacitor:
A reddit post for my capacitor thing: https://www.reddit.com/r/PCB/comments/1jo8qhs/soldering_neopixels_ws2812c_with_jlcpcbs_assembly/
Schematic
Footprint
A nice 3d model:
![]()
Thats all for today i will wait for a reply on reddit.
Day 36 (29th March 2025)
Total time 3 Hours
I have started working on a filament dryer mount for my printer which gets the filament directly from the dryer!!
I worked more on the Cad Files of printopus
Here is my finished and updated pcb with some copper blocks and a capacitor which unfortunately i dont have a 3d of but you can see the pins:

3d Model?

Day 37-38 (30th - 31st March 2025)
Total time 6 Hours
I am grinding rn im really tired lol
I finished almost evrything of the cad!!!! BL TOUCH ADDED! Oh and i have also designed a nice bltouch mount too!
Here are some good photos:

Okay imma sleep tmrw ill work on the BOM <- THE MOST Worst PART HELPPPPP
Day 39-40 (1st - 2nd April 2069)
Total time 69 hourss
Happy april fools! lol its actually 6 hours
Here is the finished Bom which is very very very very pricey bruh i am exeeding my budget i think… https://docs.google.com/spreadsheets/d/1NrEE28tm0ULvl5nzLH3Xo_gENOVdaQEKzp27CuxsBW8/edit?usp=sharing
ALSO !!! I have added something really cool:
Its basically a arm connected to a servo which automatically removes prints from the print bed!
I havent included all screws screws cauze im lazy
Thank you! This is the last day of me deisgining, I will add pictures of the finsished build